Wood Siding Replacement A Complete Guide
Wood siding replacement is more than just a home improvement; it’s an opportunity to enhance your home’s curb appeal, boost its value, and protect it from the elements. This guide walks you through every step, from choosing the right wood to understanding the costs and finding a reliable contractor. We’ll cover various wood types, the replacement process, budgeting, and long-term maintenance, ensuring you’re well-equipped to make informed decisions.
Whether you’re facing weathered siding, are planning a renovation, or simply want a fresh look, understanding the nuances of wood siding replacement is key. This guide breaks down the complexities into manageable steps, making the entire process less daunting and more achievable. We’ll cover everything from initial assessments to selecting the perfect wood and hiring a qualified professional, empowering you to navigate this project with confidence.
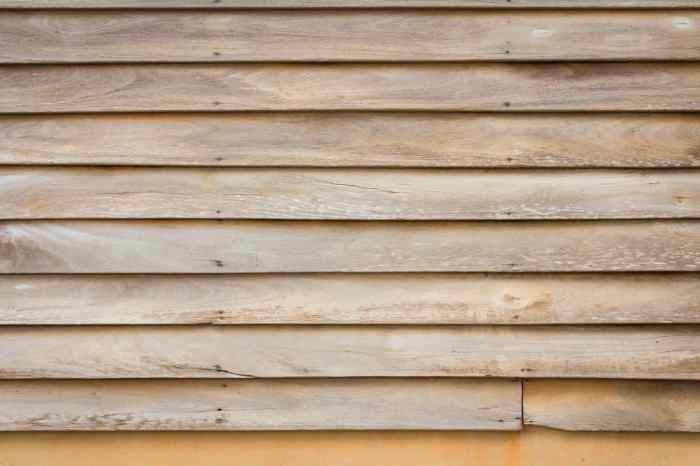
Types of Wood Siding
Source: hw.net
Choosing the right wood siding for your home is a significant decision, impacting both the aesthetic appeal and the long-term maintenance of your property. Different wood types offer varying levels of durability, resistance to the elements, and visual characteristics. Understanding these differences is crucial for making an informed choice that fits your budget and lifestyle.
Cedar Siding
Cedar, particularly Western Red Cedar, is a popular choice for its natural beauty, resistance to rot and insects, and relatively low maintenance. Its rich reddish-brown hue (though color varies depending on the grade and treatment) adds warmth and elegance to any home. Cedar is naturally durable, meaning it can withstand the elements for many years with minimal intervention. However, it’s still susceptible to damage from harsh weather and requires periodic cleaning and occasional stain or sealant application to maintain its appearance and protect against moisture. Expect to re-stain or seal every 3-5 years depending on climate and exposure.
Redwood Siding
Redwood, known for its exceptional durability and resistance to decay, is another premium option. Its rich reddish-brown color, similar to cedar, offers a classic and timeless look. Redwood’s natural oils provide inherent protection against insects and rot, requiring less frequent maintenance than some other wood types. Like cedar, however, periodic cleaning and occasional re-staining or sealing are still recommended to maintain its beauty and prolong its lifespan. The longevity of redwood often makes it a worthwhile investment in the long run, despite its higher initial cost.
Pine Siding
Pine siding is a more budget-friendly alternative compared to cedar and redwood. It’s readily available and offers a versatile look, ranging from light blonde to darker, more rustic tones depending on the species and treatment. However, pine is less naturally resistant to rot and insects than cedar or redwood, requiring more frequent maintenance, including regular treatment with preservatives and sealants. Its softer wood grain is also more susceptible to dents and scratches. While requiring more attention, pine’s affordability makes it a viable option for those on a tighter budget.
Fir Siding
Douglas Fir is a strong and durable wood often used for siding. It offers a good balance between cost and durability, falling somewhere between pine and redwood in terms of price and maintenance. Fir’s grain is more pronounced than pine, giving it a more textured appearance. Like pine, it benefits from regular treatment with preservatives and sealants to protect against rot and insect damage. While not as naturally rot-resistant as cedar or redwood, its strength and relatively low cost make it a popular choice for many homeowners.
Comparison of Wood Siding Options
Understanding the cost-effectiveness of different wood siding options requires considering not only the initial purchase price but also the long-term maintenance costs. While premium woods like cedar and redwood might have a higher upfront cost, their longevity and lower maintenance needs can lead to significant savings over the lifespan of the siding. Conversely, cheaper options like pine may require more frequent treatments, potentially offsetting the initial cost savings.
| Wood Type | Lifespan (Years) | Cost per Square Foot ($) | Maintenance Needs |
|---|---|---|---|
| Cedar | 30-50+ | $4-$8 | Periodic cleaning, staining/sealing every 3-5 years |
| Redwood | 40-60+ | $6-$10 | Periodic cleaning, staining/sealing every 5-7 years |
| Pine | 15-30 | $2-$5 | Regular cleaning, preservative treatments, staining/sealing every 2-3 years |
| Fir | 25-40 | $3-$7 | Periodic cleaning, preservative treatments, staining/sealing every 3-4 years |
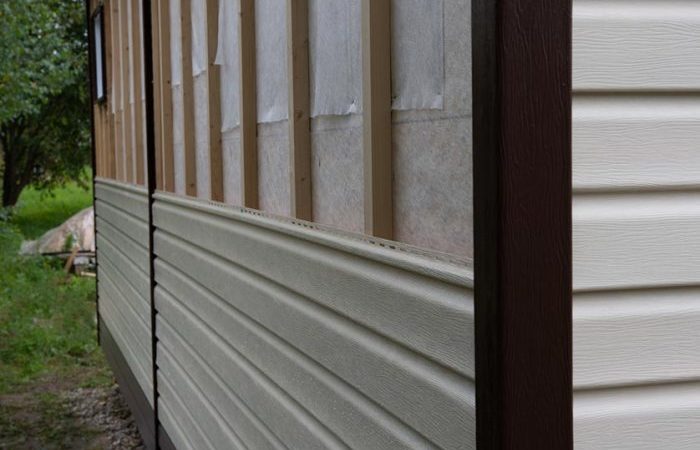
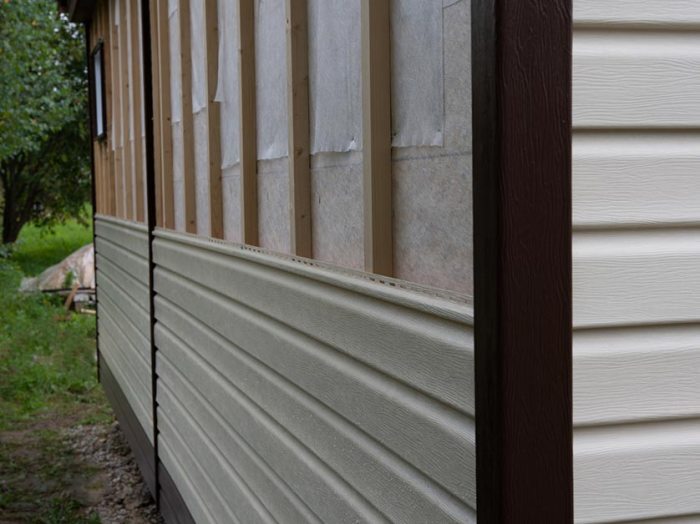
Replacement Process Stages

Source: allhomerepairsnj.com
Replacing wood siding is a significant undertaking, but breaking it down into manageable stages makes the process less daunting. This section details each step, from initial assessment to final cleanup, along with the necessary tools and crucial safety precautions. Remember, proper preparation is key to a successful project.
Initial Assessment and Planning
Before you even touch a single shingle, a thorough assessment is vital. This involves inspecting the existing siding for damage, determining the extent of the replacement needed, and selecting the new siding material. Measure the area requiring replacement accurately to calculate the amount of new siding you’ll need, adding extra for cuts and potential mistakes. Consider the existing structure and any underlying issues like rot or insect damage that may need addressing before siding replacement. This initial planning phase will significantly impact the project’s efficiency and overall cost.
Material Acquisition and Preparation
Once you’ve determined your needs, acquire all necessary materials, including the new siding, underlayment (if required), nails, caulk, and any trim pieces. Prepare the new siding by cutting it to the correct lengths, according to your measurements. This pre-cutting will significantly speed up the installation process. It’s also wise to organize materials in a way that makes them easily accessible during installation. Having everything readily available saves time and prevents delays.
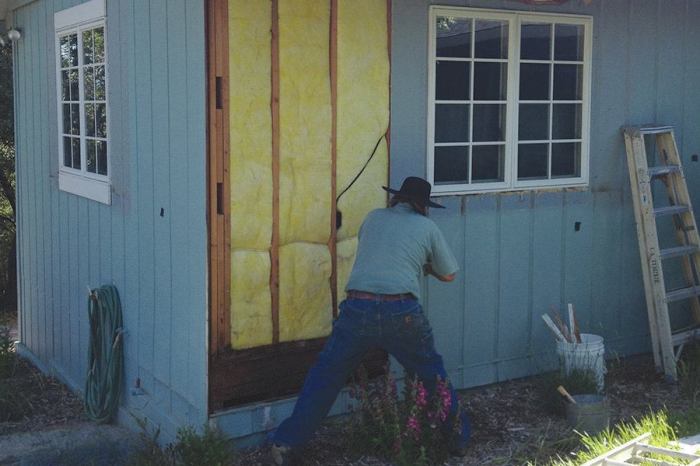
Removal of Old Siding
Carefully remove the old siding, starting from the top and working your way down. Use a pry bar or other suitable tool to gently detach the siding boards. Be mindful of underlying sheathing and avoid damaging it. Dispose of the old siding responsibly, following local regulations for waste disposal. If you encounter any significant underlying issues, like rot or insect infestation, address them before proceeding. This stage is crucial for creating a clean, level surface for the new siding.
Tools and Equipment: Pry bar, hammer, safety glasses, work gloves, possibly a circular saw for cutting difficult sections.
Safety Precautions:
- Wear safety glasses to protect your eyes from flying debris.
- Use work gloves to protect your hands.
- Use caution when using pry bars to avoid injury.
- Dispose of old siding responsibly.
Installation of New Siding, Wood siding replacement
Begin installing the new siding at the bottom, working your way up. Ensure each board is properly aligned and nailed securely. Use appropriate nails and spacing to prevent damage to the siding. Maintain consistent spacing and alignment for a professional-looking finish. Use caulk to seal gaps and joints to prevent water infiltration. Remember to follow the manufacturer’s instructions for installation. This step requires patience and attention to detail.
Tools and Equipment: Hammer, nail gun (optional but recommended), measuring tape, level, caulk gun, safety glasses, work gloves.
Safety Precautions:
- Wear safety glasses to protect your eyes from flying debris.
- Use work gloves to protect your hands.
- Use caution when using a nail gun (if applicable).
- Maintain balance and proper footing on ladders or scaffolding.
Final Touches and Cleanup
Once the new siding is installed, inspect your work for any gaps, misalignments, or other imperfections. Address any issues promptly. Caulk any remaining gaps and clean up any debris. Dispose of waste materials responsibly. This final stage ensures a quality finish and leaves the project area clean and safe.
Tools and Equipment: Caulk gun, putty knife, brushes, dustpan, trash bags.
Safety Precautions:
- Properly dispose of all waste materials.
- Clean up any debris to prevent accidents.
Cost Estimation and Budgeting
Source: homedecorbliss.com
Replacing your wood siding is a significant investment, so understanding the costs involved is crucial for planning and budgeting. This section breaks down the various cost components, explores factors influencing the total price, and provides a sample budget to help you get started. Accurate cost estimation is key to avoiding unexpected expenses during your project.
Cost Components of Wood Siding Replacement
Several factors contribute to the overall cost of a wood siding replacement project. These can be broadly categorized into materials, labor, and permits. Material costs vary depending on the type of wood, its quality, and the quantity needed. Labor costs are influenced by the size of your house, the complexity of the job, and regional labor rates. Permitting fees are determined by local regulations and the scope of your project.
Factors Influencing Project Cost
The total cost of your wood siding replacement project is highly variable. House size is a primary driver; larger houses naturally require more materials and labor, increasing the overall expense. The type of wood siding you choose significantly impacts the cost. Exotic hardwoods like cedar or redwood are more expensive than standard pine or fir. Labor rates fluctuate geographically and seasonally. Areas with high demand for skilled labor will typically have higher labor costs. Finally, the condition of your existing siding and the complexity of the installation can also influence the overall project cost. For example, extensive rot repair or the need for specialized techniques will add to the expense.
Sample Budget Spreadsheet
This sample budget provides a framework for allocating costs. Remember to adjust the figures based on your specific project details.
| Cost Item | Quantity/Rate | Unit Cost | Total Cost |
|---|---|---|---|
| Materials (Wood Siding) | 1000 sq ft | $8/sq ft | $8000 |
| Materials (Fasteners, etc.) | $500 | ||
| Labor (Removal of Old Siding) | 2 days | $500/day | $1000 |
| Labor (Installation of New Siding) | 4 days | $500/day | $2000 |
| Permits | $300 | ||
| Contingency (10%) | $1330 | ||
| Total Estimated Cost | $13130 |
Note: This is a simplified example. Actual costs may vary depending on your specific circumstances. Always obtain multiple quotes from reputable contractors to ensure you’re getting a fair price. The contingency amount is crucial; unforeseen issues often arise during construction.
Finding and Hiring Contractors: Wood Siding Replacement
Choosing the right contractor for your wood siding replacement is crucial for a successful project. A poorly chosen contractor can lead to shoddy workmanship, cost overruns, and significant headaches. Thorough research and careful vetting are essential to protect your investment and ensure a smooth renovation process.
Finding a reliable contractor involves more than just checking online reviews. It requires a systematic approach to ensure you’re partnering with someone experienced, reputable, and capable of delivering the quality you expect. This includes understanding their qualifications, insurance coverage, and past performance.
Contractor Research and Vetting
Before contacting any contractors, it’s wise to compile a list of potential candidates. You can obtain this list through referrals from friends, family, or neighbors, online searches focusing on local contractors specializing in wood siding, and checking with your local building association or home improvement stores. Once you have a list, you can start your vetting process. This involves checking their online presence, looking for reviews on sites like Yelp or Angie’s List, and verifying their licensing and insurance. Checking the Better Business Bureau (BBB) for complaints or ratings can also be helpful. You should look for a consistent history of positive reviews and a lack of significant negative feedback.
Key Questions to Ask Prospective Contractors
Asking the right questions during the interview process is vital. The information you gather will help you assess the contractor’s experience, understanding of your project, and overall professionalism. This information will be crucial in making an informed decision.
- Years of experience in wood siding replacement and the number of similar projects completed.
- Detailed breakdown of the project timeline, including start and completion dates.
- Specific details of the materials they intend to use, including brand names and warranties.
- Their approach to handling unforeseen issues and how they manage change orders.
- References from previous clients, ideally with contact information for verification.
- Their process for obtaining necessary permits and inspections.
- Their insurance coverage, including workers’ compensation and liability insurance.
- Their warranty policy on both workmanship and materials.
Essential Documents to Review
Before signing a contract, thoroughly review the necessary documents to ensure the contractor is legitimate and properly insured. This is a critical step to protect yourself from potential problems.
- Contractor’s License: Verify the license is current and valid with the relevant licensing board in your area. A contractor operating without a license may be operating illegally and may not be properly insured.
- Proof of Insurance: Request copies of both general liability insurance and workers’ compensation insurance. These protect you from financial responsibility if accidents occur on your property.
- References: Contact at least three references and inquire about their experience with the contractor. Ask about the quality of work, adherence to timelines, and how the contractor handled any problems that arose.
- Contract: Carefully review the contract, ensuring it includes the scope of work, payment schedule, materials to be used, project timeline, and warranty information. Don’t hesitate to seek legal advice if needed.
Maintenance and Longevity
Investing in new wood siding is a significant home improvement; proper maintenance is key to protecting this investment and maximizing its lifespan. Regular care will prevent costly repairs and keep your home looking its best for years to come. Understanding the common issues and implementing preventative measures will ensure your siding remains a beautiful and durable feature of your property.
Proper maintenance of your wood siding significantly extends its life and preserves its aesthetic appeal. Neglecting this crucial aspect can lead to premature deterioration, necessitating costly repairs or even complete replacement. This section provides the best practices for maintaining your newly installed wood siding and addressing common problems.
Cleaning Wood Siding
Regular cleaning removes dirt, mildew, and other debris that can damage the wood and compromise its protective finish. A thorough cleaning, ideally twice a year (spring and fall), is recommended. The best approach involves using a pressure washer with a low-pressure nozzle to avoid damaging the wood’s surface. Always start by rinsing the siding thoroughly to loosen dirt. For tougher stains, a solution of mild detergent and water can be applied, followed by another rinse. A final rinse with clean water ensures all soap residue is removed. Allow the siding to dry completely before applying any treatment.
Treating Wood Siding
Protecting your wood siding with a high-quality water-repellent sealant or stain is essential. These products help prevent moisture absorption, which is a major cause of rot and decay. Apply the sealant or stain according to the manufacturer’s instructions, ensuring even coverage. Re-application is typically needed every 2-3 years, depending on the product and the climate. Choose a sealant or stain that is specifically designed for exterior wood siding and provides UV protection to prevent fading and discoloration.
Addressing Common Problems
Several issues can affect wood siding over time. Rot and decay, caused by moisture penetration, are common problems, often appearing as soft or discolored areas. Prompt attention is crucial; affected areas may need to be repaired or replaced. Insect infestation, such as termites or carpenter ants, can also cause significant damage. Regular inspections and professional pest control treatments are recommended. Finally, cracks and splits in the wood can occur due to weathering and temperature fluctuations. These should be repaired using wood filler to prevent further damage and maintain the siding’s integrity.
Visual Guide: Cleaning and Treating Wood Siding
Image 1: Pressure Washing – This image depicts a person using a pressure washer with a low-pressure nozzle to gently clean wood siding. The nozzle is held at a safe distance from the surface to avoid damage. The siding is visibly clean after the process. The surrounding area is protected to prevent overspray.
Image 2: Applying Wood Cleaner – This image shows someone applying a mixture of mild detergent and water to the wood siding using a soft-bristled brush. The brush is gently moved in a vertical motion, ensuring even application. Protective eyewear and gloves are worn to prevent accidental contact with the cleaning solution.
Image 3: Applying Sealant – This image illustrates the application of a wood sealant using a brush or roller. The sealant is applied evenly in long, overlapping strokes, ensuring complete coverage. The image shows a person working methodically, paying close attention to detail. The sealant is appropriate for exterior use and provides UV protection.
Image 4: Repairing Damaged Wood – This image demonstrates the repair of a damaged section of wood siding using wood filler. The damaged area is cleaned and prepared before the filler is applied and smoothed. Once dry, the filled area is sanded smooth and painted to match the existing siding.
Environmental Considerations
Source: pritchettroofing.com
Choosing wood siding involves environmental considerations throughout its lifecycle, from the forest to your home and eventually, disposal. Understanding these impacts helps homeowners make informed decisions about sustainable practices and the overall environmental footprint of their home improvements.
The environmental impact of wood siding is multifaceted. Sourcing wood responsibly is crucial to minimizing deforestation and habitat loss. The manufacturing process, including transportation and treatment with preservatives, also contributes to the overall carbon footprint. Finally, disposal or recycling of old siding at the end of its life needs careful consideration.
Wood Siding Sourcing and its Impact
Responsible sourcing is paramount. Sustainable forestry practices, such as selective logging and replanting, help ensure the long-term health of forests and reduce the environmental impact. Look for certifications like the Forest Stewardship Council (FSC) label, which indicates that the wood comes from responsibly managed forests. Purchasing wood from local sources can also reduce transportation emissions and support local economies. Conversely, unsustainable logging practices lead to deforestation, biodiversity loss, and soil erosion, significantly increasing the environmental cost. The choice between sustainably sourced and unsustainably sourced wood dramatically alters the environmental impact.
Comparing Wood Siding to Other Cladding Options
Wood siding’s environmental impact compared to other materials is complex. While wood is a renewable resource, its processing and transportation still contribute to emissions. Vinyl siding, for example, is a petroleum-based product with a high carbon footprint during manufacturing and a limited recyclability. Metal siding, often made from aluminum or steel, has high embodied energy due to the intensive energy required for its production. Fiber cement siding, a composite material, also has an environmental impact associated with its manufacturing process. The “best” option depends on several factors, including the specific materials used, the sourcing practices, and the end-of-life management. A life cycle assessment (LCA) can provide a comprehensive comparison of the environmental impacts of different cladding options. For example, a study might compare the embodied carbon of sustainably harvested wood siding to the embodied carbon of vinyl siding, highlighting the potential environmental advantages of responsible wood sourcing.
Sustainable Practices in Wood Siding Replacement
Several sustainable practices can mitigate the environmental impact of wood siding replacement. Choosing reclaimed or recycled wood reduces the demand for newly harvested timber. Proper disposal or recycling of old siding prevents it from ending up in landfills. Many municipalities have programs for wood waste recycling or composting. Using locally sourced wood minimizes transportation emissions. Selecting wood treated with low-impact preservatives further reduces the environmental burden. For example, a homeowner might choose to use reclaimed barn wood for their siding, reducing the demand for newly harvested timber and giving a unique aesthetic to their home. Furthermore, they could work with a contractor who specializes in responsible waste management, ensuring that the old siding is properly recycled or disposed of.
Warranty and Guarantees
Understanding the warranty and guarantee offered for your new wood siding is crucial. These documents protect your investment and outline the responsibilities of both the contractor and the manufacturer in case of defects or problems. A thorough review before signing any contracts is essential to avoid costly disputes later.
A comprehensive warranty should clearly define what’s covered, for how long, and under what conditions. Key aspects to examine include the duration of the warranty, the specific components covered (siding, installation, labor), exclusions, and the process for filing a claim. Paying close attention to these details will ensure you are adequately protected.
Warranty Coverage Details
Warranty periods vary greatly depending on the type of wood siding, the manufacturer, and the contractor’s work. Some manufacturers offer warranties that cover defects in materials for 10-25 years, while others might only offer a shorter period. Installation warranties from contractors are typically shorter, often covering labor for 1-2 years. It’s important to note that warranties usually don’t cover damage caused by normal wear and tear, acts of God (like hurricanes or floods), or improper maintenance. For example, a manufacturer’s warranty might exclude damage caused by incorrect staining or failure to address pest infestations. A contractor’s warranty might exclude damage resulting from the homeowner’s failure to maintain the siding according to the manufacturer’s instructions.
Common Warranty Clauses and Their Implications
Many warranties include clauses limiting liability, specifying dispute resolution processes, and outlining conditions that void the warranty. A common clause might limit the manufacturer’s liability to repair or replacement of defective materials, rather than covering consequential damages (such as damage to underlying structure caused by water infiltration due to faulty siding). Another common clause might require homeowners to provide proof of proper maintenance to be eligible for warranty coverage. For instance, a failure to provide documentation showing regular cleaning and treatment of the wood siding could invalidate a claim. Some warranties might specify that disputes must be resolved through arbitration or mediation, rather than through litigation. This clause aims to reduce costs and time involved in resolving warranty claims.
Last Point
Replacing your wood siding is a significant investment, but with careful planning and execution, it can dramatically improve your home’s aesthetic appeal and longevity. By understanding the different types of wood, the replacement process, cost factors, and maintenance requirements, you can make informed choices that suit your budget and lifestyle. Remember to thoroughly vet contractors, prioritize safety, and appreciate the long-term benefits of a beautifully restored exterior. Your updated home will be a testament to your hard work and planning.
Frequently Asked Questions
How long does wood siding replacement typically take?
The timeframe varies greatly depending on the size of your home, the complexity of the project, and weather conditions. Expect it to take anywhere from a few days to several weeks.
Can I do wood siding replacement myself?
While possible for smaller projects, replacing wood siding is a challenging task requiring specialized skills and tools. For larger homes, hiring professionals is highly recommended to ensure quality and safety.
What’s the best time of year to replace wood siding?
Spring or fall are generally ideal. Avoid extreme heat or cold, as these conditions can impact the installation process and the longevity of the siding.
What type of warranty should I expect?
Look for warranties covering both materials and workmanship. The length of the warranty can vary, but aim for at least a 10-year warranty on materials and 1-2 years on labor.
How often should I clean my wood siding?
Regular cleaning, at least once or twice a year, is crucial to prevent mold, mildew, and algae growth. Use a gentle cleaner and a soft brush to avoid damaging the wood.
Comments are closed.