Wood Siding Maintenance A Complete Guide
Wood siding maintenance isn’t just about keeping your home looking good; it’s about protecting a significant investment. This guide dives into the specifics of caring for your wood siding, from understanding the different types of wood and their unique needs to tackling repairs and preventing future damage. We’ll cover everything from basic cleaning and inspection to more advanced techniques, empowering you to keep your siding in top shape for years to come. Whether you’re a seasoned DIYer or a complete beginner, this comprehensive resource will equip you with the knowledge and confidence to maintain your home’s exterior beauty.
We’ll explore the various types of wood siding, detailing their pros and cons in terms of durability, maintenance requirements, and aesthetic appeal. Then, we’ll walk you through the process of regular cleaning, inspection, and repair, including practical advice on identifying and addressing common problems like cracks, rot, and pest infestations. Finally, we’ll delve into preventative measures, protective coatings, and when it’s best to call in a professional for assistance. Get ready to become a wood siding expert!
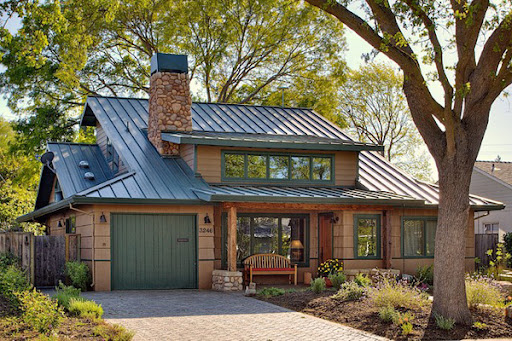
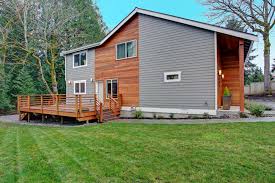
Types of Wood Siding

Choosing the right wood siding for your home is a big decision, impacting both its aesthetic appeal and longevity. Different wood types offer varying levels of durability, maintenance needs, and visual characteristics. Understanding these differences is crucial for making an informed choice that suits your budget and lifestyle.
Common Wood Siding Types and Their Characteristics
Let’s explore some of the most popular wood siding options. Each has its strengths and weaknesses, making certain types better suited for specific climates and homeowner preferences.
| Wood Type | Durability | Maintenance Requirements | Aesthetic Qualities |
|---|---|---|---|
| Cedar | High; naturally resistant to rot and insects. Expect a lifespan of 20-30 years or more with proper care. | Moderate; requires periodic cleaning and occasional staining or sealing to protect against the elements. | Rich, warm tones; varied grain patterns; naturally beautiful and versatile, offering a range of colors from light to dark brown. |
| Redwood | Very High; exceptionally durable and resistant to decay and insects due to its natural oils. Can last 40 years or more. | Low to Moderate; similar to cedar, requiring occasional cleaning and periodic re-application of a protective finish. | Deep reddish-brown hues; straight grain; known for its resistance to warping and cracking, maintaining its aesthetic appeal for decades. |
| Pine | Moderate; less naturally resistant to rot and insects compared to cedar and redwood. Lifespan is typically shorter, around 15-20 years. | High; requires more frequent maintenance, including regular staining or sealing, to prevent damage. More susceptible to insect infestation. | Light to medium brown tones; softer wood, offering a more rustic appearance; can be easily painted to achieve various styles. |
| Fir | Moderate to High; Durability varies depending on the specific type of fir. Generally more durable than pine, but less so than cedar or redwood. | Moderate; Requires regular cleaning and periodic staining or sealing. Susceptibility to damage varies depending on the specific type and climate. | Light to medium brown; straight grain; Offers a clean, classic look, often used in more traditional styles. |
Regular Cleaning and Inspection
Keeping your wood siding looking its best and lasting for years involves a regular cleaning and inspection routine. Neglecting this can lead to premature deterioration and costly repairs down the line. Think of it like regular car maintenance – small efforts prevent big problems.
Regular cleaning removes dirt, mildew, and other debris that can damage the wood and compromise its protective finish. Inspection allows you to catch small problems before they become large, expensive headaches. Early detection is key to preserving the beauty and longevity of your siding.
Cleaning Wood Siding
Cleaning your wood siding is a straightforward process, but it’s important to use the right methods and materials to avoid damaging the wood. Harsh chemicals or excessive scrubbing can strip away protective finishes and leave your siding vulnerable.
- Preparation: Start by clearing the area around your house. Remove any plants, furniture, or other items that could be damaged by cleaning solutions. Also, consider the weather; a slightly overcast day is ideal, avoiding direct sunlight which can cause cleaning solutions to dry too quickly.
- Solution Preparation: Mix a gentle cleaning solution. A solution of mild dish soap and water is usually sufficient. For tougher mildew stains, you might consider adding a solution of oxygen bleach (following product instructions carefully) to the mix. Avoid using strong chemical cleaners, as they can damage the wood and its finish.
- Cleaning: Use a soft-bristled brush or a long-handled scrub brush to gently clean the siding. Work in sections, rinsing each section thoroughly with clean water from a hose or pressure washer (using a low-pressure setting to avoid damaging the wood). Avoid using high-pressure washers, which can force water behind the siding and cause damage.
- Drying: Allow the siding to air dry completely. Avoid using high-pressure water to speed up the process, as this can damage the wood. A slightly overcast day is best to avoid the sun’s harsh rays drying the wood too quickly.
Identifying Early Signs of Damage
Regular inspections are crucial for early detection of problems. Catching issues early means less extensive (and expensive) repairs. Look for subtle signs of trouble during your inspections.
- Cracks and Splits: Look for any cracks or splits in the wood. These can be caused by weathering, insect infestation, or improper installation.
- Rot and Decay: Soft, spongy wood is a clear sign of rot. Check for discoloration, especially dark or water-stained areas.
- Mildew and Mold: These appear as dark spots or streaks, often in shaded areas. Regular cleaning can prevent this, but persistent mildew indicates a problem.
- Insect Infestation: Look for small holes or tunnels in the wood, indicating possible insect damage. Check for sawdust or insect frass (droppings).
- Loose or Damaged Siding: Check for any siding that is loose, pulling away from the house, or showing signs of damage from impact.
Common Problems During Inspections
- Water Damage: This can manifest as rot, discoloration, or swelling of the wood. Proper flashing and caulking are crucial to prevent this.
- Insect Infestation: Termites and carpenter ants are common culprits. Professional pest control may be necessary.
- Paint or Stain Failure: Peeling, blistering, or fading paint or stain indicates a need for repainting or restaining.
- Improper Installation: Issues like gaps between siding pieces or improper flashing can lead to water damage and other problems.
Repairing Damaged Siding
Keeping your wood siding in top shape involves addressing damage as it occurs. Ignoring small problems can lead to larger, more costly repairs down the line. This section includes common damage types and how to tackle them, from minor fixes to more extensive replacements.
Types of Wood Siding Damage
Wood siding is susceptible to various forms of damage. Understanding these issues is the first step to effective repair. Common problems include cracking, rot, and insect infestation. Cracks can range from hairline fissures to significant splits, often caused by expansion and contraction due to weather changes or impacts. Rot, typically caused by moisture exposure, weakens the wood and leads to structural compromise. Insect infestation, such as from termites or carpenter ants, can cause significant internal damage, weakening the wood and leaving it vulnerable to further deterioration.
Repairing Minor Damage
Minor damage, such as small cracks or superficial damage, can often be addressed with relatively simple repairs. For small cracks, wood filler can effectively seal the gap, preventing moisture intrusion and restoring structural integrity. The filler should be carefully applied, matching the wood’s color as closely as possible, and then sanded smooth for a seamless finish. For minor surface damage, sanding and re-staining or painting can often restore the appearance of the siding. Remember to always use appropriate safety gear such as gloves and eye protection when working with wood filler or sanding tools.
Repairing Extensive Damage
More extensive damage, such as rotted sections or significant insect infestation, necessitates more involved repairs. Replacing individual boards or even larger sections of siding may be required. This often involves removing the damaged section, carefully measuring the replacement piece, and then securing it in place using appropriate fasteners. Matching the wood type and finish of the replacement to the existing siding is crucial for maintaining the aesthetic appeal of the home’s exterior. If the damage is widespread, it’s advisable to consult a professional contractor to ensure proper repair and prevent further issues.
Replacing a Damaged Board: A Step-by-Step Guide, Wood siding maintenance
Replacing a damaged board is a relatively straightforward process, but careful execution is key. Imagine the damaged board is located on a wall, near a window.
- Preparation: Gather necessary tools including a pry bar, hammer, measuring tape, saw, new replacement board (matching the existing siding in type and finish), nails or screws, and sealant.
- Removal: Carefully pry the damaged board away from the surrounding boards, using the pry bar to gently loosen the nails or screws. Work slowly and methodically to avoid damaging adjacent boards. If nails are particularly stubborn, use a nail puller to avoid damaging the surrounding wood.
- Measurement: Accurately measure the length and width of the removed board to ensure the replacement piece fits correctly. Consider adding a small amount to account for potential trimming.
- Cutting (if necessary): If the replacement board needs to be cut to size, use a saw to make clean, precise cuts. Ensure the cut is straight and at a right angle.
- Installation: Position the new board in place, aligning it with the surrounding boards. Secure it using nails or screws, driving them in at an angle to prevent splitting the wood. Space the fasteners appropriately for optimal holding power.
- Finishing: Once the board is securely fastened, apply sealant around the edges to prevent moisture penetration. If necessary, stain or paint the new board to match the existing siding. Allow the sealant and paint to dry completely before considering the job complete.
Protecting Wood Siding: Wood Siding Maintenance
Keeping your wood siding looking its best and extending its lifespan requires regular protection. Exposure to the elements—sun, rain, snow, and temperature fluctuations—can cause significant damage over time, leading to cracking, warping, rotting, and fading. Applying a protective coating is crucial to mitigating these issues and maintaining the beauty of your home’s exterior.
Protecting your wood siding involves choosing and applying the right finish. This decision depends on factors such as the type of wood, your desired aesthetic, and your budget. Proper application is also key to ensuring the coating effectively protects your siding and lasts for years.
Wood Siding Finishes: Paint versus Stain
Paint and stain are the two primary choices for protecting wood siding. Both offer protection, but they achieve this in different ways and have distinct advantages and disadvantages.
Paint forms a solid, opaque layer over the wood, completely hiding the natural grain and texture. This provides excellent protection against UV rays, moisture, and insects. Paint is available in a vast array of colors, allowing for significant creative freedom in matching your home’s style. However, paint can chip and peel over time, requiring more frequent reapplication than stain. Also, repainting requires more preparation, such as sanding and priming.
Stain, on the other hand, penetrates the wood, enhancing its natural beauty while providing a degree of protection. Stain allows the wood grain to show through, offering a more natural look. While stain offers protection from UV damage and moisture, it generally doesn’t provide the same level of protection against insects as paint. Stain typically requires less frequent reapplication than paint, but it may need more frequent touch-ups in high-traffic areas.
Applying a Protective Coating to Wood Siding
Proper application is critical for a long-lasting finish. Here’s a step-by-step guide:
- Preparation: Clean the siding thoroughly to remove dirt, mildew, and loose paint or stain. Use a pressure washer (low pressure setting) or a stiff brush and appropriate cleaning solution. Allow the siding to dry completely.
- Repair: Address any damaged areas, such as cracks or rot, before applying the coating. This ensures a smooth, even finish and prevents further damage.
- Priming (if necessary): If using paint, apply a primer designed for exterior wood. A primer helps the paint adhere better and provides a more even finish. Stain generally doesn’t require a primer unless the wood is particularly porous or absorbent.
- Application: Apply the paint or stain using a brush, roller, or sprayer, following the manufacturer’s instructions. Work in small sections, ensuring even coverage. Avoid applying too much at once, as this can lead to drips and runs. Multiple thin coats are generally better than one thick coat.
- Drying Time: Allow sufficient drying time between coats, as specified by the manufacturer. This ensures proper adhesion and prevents issues with the finish.
Choosing the Right Color and Finish
The color and finish you choose should complement your home’s architectural style and surrounding landscape. Consider the existing colors of your roof, windows, and landscaping. A color consultation might be helpful to determine the most suitable shades for your home. For instance, a traditional home might look best with a classic color scheme, while a modern home could benefit from a more contemporary palette. Matte finishes generally hide imperfections better, while gloss or semi-gloss finishes provide a more durable and easily cleaned surface. Remember to consider the long-term implications of your color choice; darker colors tend to absorb more heat, which could impact energy efficiency.
Preventing Future Damage

Keeping your wood siding looking great and lasting for years involves proactive prevention. Understanding the common culprits of damage and implementing simple maintenance strategies can significantly extend the lifespan of your siding and save you money on costly repairs down the road. This section focuses on identifying potential threats and establishing a routine to minimize them.
Preventing future damage to your wood siding requires a multi-pronged approach focusing on environmental protection, pest control, and regular maintenance. Ignoring these factors can lead to rot, insect infestation, warping, and ultimately, the need for extensive and expensive repairs. By implementing the strategies outlined below, you can significantly reduce the risk of future damage and enjoy the beauty of your wood siding for many years to come.
Factors Contributing to Wood Siding Damage
Several factors contribute to the deterioration of wood siding. These include exposure to the elements, insect infestation, and improper installation or maintenance. Weather, especially prolonged exposure to moisture, is a major culprit, leading to rot, warping, and cracking. Various insects, such as termites and carpenter ants, can bore into the wood, weakening its structure and creating entry points for moisture. Neglecting regular cleaning and inspection also allows problems to fester and worsen over time.
Preventative Measures for Wood Siding
Proactive measures are key to preserving your wood siding’s integrity. Proper ventilation prevents moisture buildup, a major cause of rot. Regular gutter cleaning ensures water flows away from the house, preventing water damage. Strategic landscaping can also play a crucial role in protecting your siding.
- Proper Ventilation: Ensure adequate air circulation around your home to prevent moisture accumulation. This can involve checking and cleaning soffit vents and ensuring that there’s no blockage preventing airflow.
- Gutter Maintenance: Clean gutters regularly (at least twice a year, spring and fall) to prevent water from overflowing and damaging the siding. Repair any leaks or damage to the gutters and downspouts promptly.
- Strategic Landscaping: Keep vegetation trimmed away from the house to prevent moisture buildup and provide sufficient space for air circulation. Avoid planting trees or shrubs directly against the siding.
- Regular Cleaning: Wash your siding at least once a year using a gentle cleaner and soft brush to remove dirt, mildew, and other debris. This prevents the buildup of contaminants that can damage the wood.
- Pest Control: Regularly inspect your siding for signs of insect infestation. Address any infestations promptly with appropriate pest control measures, either through professional services or DIY solutions, depending on the severity and type of infestation. Preventative treatments can also be applied.
- Prompt Repair of Damage: Address any minor damage to your siding immediately. Small cracks or holes can quickly escalate into larger problems if left unattended. Repairing them promptly will prevent further damage and save you money in the long run.
Creating a Maintenance Schedule
A regular maintenance schedule is crucial for preventing future damage. This schedule should include tasks such as cleaning, inspection, and repair. A sample schedule could be:
- Spring: Thorough cleaning, inspection for damage, gutter cleaning, and minor repairs.
- Summer: Inspection for insect damage, addressing any issues found.
- Fall: Another thorough cleaning, gutter cleaning, and inspection for damage from the summer storms.
- Winter: Inspection for ice damage and addressing any issues.
Remember to adjust this schedule based on your specific climate and the condition of your siding. Regular inspections are key to catching small problems before they become major headaches. Consider taking photos after each maintenance session to document the condition of your siding and track any changes over time.
Dealing with Pests and Mold
Wood siding, while beautiful and durable, is susceptible to damage from pests and mold. These issues not only compromise the aesthetic appeal of your home but can also lead to significant structural problems if left untreated. Regular inspection and proactive measures are crucial to maintaining the health and longevity of your wood siding.
Common Pests and Molds Affecting Wood Siding
Several pests and types of mold can attack wood siding, each requiring a different approach to treatment. Common insect pests include termites, carpenter ants, and powderpost beetles. These insects bore into the wood, weakening its structure and creating pathways for moisture intrusion. Mold and mildew, on the other hand, thrive in damp conditions and can cause discoloration, rot, and structural damage. Identifying the specific pest or mold is the first step in effective treatment.
Preventing and Treating Pest Infestations
Prevention is key when it comes to pest infestations. Maintaining good ventilation around your home helps to discourage insects by reducing moisture buildup. Regularly inspect your siding for signs of infestation, such as small holes, frass (insect droppings), or mud tubes (termites). For termite prevention, consider a professional termite inspection and treatment. This often involves soil treatment around the foundation to create a barrier against termites. Carpenter ant infestations can often be addressed by identifying and eliminating their nests, which may be located inside walls or under decks. In cases of severe infestation, professional pest control is recommended.
Removing Mold and Mildew from Wood Siding
Mold and mildew removal requires a careful approach. Never use bleach directly on wood siding, as it can damage the wood and cause discoloration. Begin by gently cleaning the affected area with a solution of water and a mild detergent using a soft-bristled brush. For stubborn mold, a solution of trisodium phosphate (TSP) can be effective, but always follow the manufacturer’s instructions carefully and wear appropriate protective gear, including gloves and eye protection. After cleaning, rinse the area thoroughly with clean water and allow it to dry completely. For extensive mold damage, professional remediation may be necessary.
Pest/Mold Treatment Methods
| Pest/Mold Type | Treatment Method |
|---|---|
| Termites | Professional termite treatment (soil treatment, baiting systems); repair of damaged wood. |
| Carpenter Ants | Locate and eliminate nests; professional pest control for severe infestations; repair of damaged wood. |
| Powderpost Beetles | Infested wood may need to be replaced; professional fumigation may be necessary for severe infestations. |
| Mold and Mildew | Cleaning with a solution of water and mild detergent; for stubborn mold, use a solution of TSP (following manufacturer’s instructions carefully); professional remediation for extensive damage. |
When to Call a Professional
Knowing when to tackle a wood siding repair yourself and when to call in the professionals is crucial for maintaining your home’s exterior and avoiding costly mistakes. While many minor repairs are manageable for DIY enthusiasts, some situations demand the expertise of a qualified contractor. This section will provide articles, scenarios requiring professional help, and guide you through finding a reputable contractor.
Professional help is invaluable when dealing with extensive damage, complex repairs, or tasks requiring specialized tools and knowledge. Hiring a professional ensures the job is done correctly, efficiently, and safely, protecting your investment in your home’s exterior. They possess the experience to diagnose problems accurately, select the right materials, and execute repairs that stand the test of time. Attempting complex repairs without proper training could lead to further damage, increased costs, and potentially compromise your home’s structural integrity.
Identifying Situations Requiring Professional Assistance
Several situations indicate the need for professional help. These include extensive rot or insect infestation requiring significant board replacement, damage from severe weather events (like hurricanes or hailstorms), the need for specialized techniques like pressure washing for mold removal, or any situation where you feel uncertain about your abilities to complete the repair safely and effectively. For example, if a large section of siding has been compromised due to a tree falling against the house, professional assistance is necessary to assess the structural integrity and safely remove and replace damaged sections. Similarly, if you suspect extensive termite damage, a professional inspection and treatment are vital to prevent further spread.
Benefits of Hiring a Professional
Hiring a qualified contractor offers numerous advantages. Professionals possess the necessary skills and experience to accurately assess the extent of damage, choose appropriate materials, and perform repairs to the highest standards. They are equipped with the proper tools and safety equipment, minimizing the risk of accidents and ensuring efficient completion of the project. This translates to a longer-lasting repair, improved curb appeal, and protection of your home’s value. A professional’s warranty also offers an extra layer of protection, providing peace of mind. For instance, a professional can efficiently and safely remove asbestos siding, a task that’s highly regulated and dangerous for untrained individuals.
Finding a Reputable and Qualified Professional
Finding a reliable contractor involves thorough research and due diligence. Start by seeking recommendations from friends, family, or neighbors. Online reviews and ratings on platforms like Yelp or Angie’s List can also be helpful, but remember to critically evaluate the reviews. Check if the contractor is licensed and insured, and verify their experience with wood siding repairs. Requesting references and contacting past clients to inquire about their experiences can provide valuable insights into the contractor’s work quality and professionalism. Don’t hesitate to ask to see examples of their previous work. A reputable contractor will be transparent and happy to provide this information.
Questions to Ask a Potential Contractor
Before hiring any contractor, it’s essential to ask clarifying questions to ensure they’re the right fit for the job. This process helps to establish clear expectations and avoid potential misunderstandings.
- What is your experience with wood siding repair and the specific type of wood siding on my home?
- Are you licensed and insured? Can you provide proof of insurance and licensing?
- Can you provide references from past clients?
- What is your estimated timeline for completing the project?
- What is your pricing structure, and what is included in the total cost?
- What is your warranty policy?
- What is your process for handling unforeseen issues or changes during the project?
- What type of materials do you plan to use, and are they suitable for my home’s siding?
Final Review
Maintaining your wood siding is a continuous process, but with the right knowledge and a proactive approach, you can significantly extend its lifespan and preserve your home’s curb appeal. Remember, regular inspections, prompt repairs, and preventative measures are key. By following the steps outlined in this guide, you can confidently tackle most maintenance tasks yourself, saving money and enjoying the satisfaction of a job well done. And don’t forget, knowing when to seek professional help is just as important as knowing how to handle smaller issues. With a little care and attention, your wood siding will remain a beautiful and protective feature of your home for many years to come.
Helpful Answers
What’s the best time of year to clean wood siding?
Spring or fall, when temperatures are moderate and rain is less frequent, are ideal times. Avoid cleaning during extreme heat or cold.
How often should I inspect my wood siding?
At least twice a year, in the spring and fall, is recommended for thorough inspections.
Can I use a pressure washer on wood siding?
Use caution! High pressure can damage wood. A lower pressure setting or a garden hose with a strong nozzle is safer.
What type of paint or stain is best for wood siding?
The best choice depends on the wood type and your preference. Consult a paint specialist for personalized advice.
How long does wood siding typically last?
With proper maintenance, wood siding can last 20-50 years or more, depending on the wood type and climate.
Comments are closed.