Replacing Exterior Siding A Homeowners Guide
Replacing exterior siding is a significant home improvement project that can dramatically enhance your home’s curb appeal and protect it from the elements. This guide walks you through the entire process, from choosing the right siding material to completing the installation and maintaining your new siding for years to come. We’ll cover various siding types – vinyl, fiber cement, wood, and metal – comparing their costs, lifespans, and maintenance needs. Get ready to transform your home’s exterior!
We’ll delve into the practical aspects, providing step-by-step instructions for siding removal, surface preparation, and installation techniques for each material. Learn about crucial safety precautions, essential tools, and common mistakes to avoid. We’ll also explore budgeting considerations, including material costs, labor expenses, and financing options, empowering you to make informed decisions throughout your project.
Types of Exterior Siding
Choosing the right exterior siding is a crucial decision impacting your home’s curb appeal, energy efficiency, and long-term maintenance. Several materials offer distinct advantages and disadvantages, each suited to different budgets and aesthetic preferences. Let’s explore some popular options.
Vinyl Siding
Vinyl siding is a popular choice due to its affordability and low maintenance. It’s typically made from polyvinyl chloride (PVC), offering a wide range of colors and styles to mimic wood or other materials. A typical lifespan for vinyl siding is 20-30 years, depending on quality and exposure to the elements. Maintenance is minimal, usually involving occasional washing to remove dirt and debris. However, vinyl siding can be susceptible to damage from impact and extreme temperatures, and it doesn’t offer the same insulation value as some other materials. Cost-wise, vinyl siding generally falls in the lower to mid-range price bracket.
Fiber Cement Siding
Fiber cement siding, a composite material made from cement, cellulose fibers, and sand, boasts superior durability and fire resistance compared to vinyl. It can withstand harsh weather conditions and is less prone to damage from impact. While more expensive than vinyl, fiber cement offers a longer lifespan, often exceeding 50 years. Maintenance involves occasional cleaning and repainting, but the material itself is incredibly resilient. A key disadvantage is its weight, requiring more robust installation techniques. The higher upfront cost is often offset by its longevity and low maintenance needs.
Wood Siding
Wood siding, particularly cedar and redwood, offers unparalleled aesthetic appeal with its natural beauty and texture. Cedar and redwood are known for their natural resistance to rot and insects, but they still require regular maintenance, including staining or painting every few years to protect against the elements. Composite wood siding provides a more durable and low-maintenance alternative, mimicking the look of natural wood while resisting rot, insects, and warping. However, composite wood can be more expensive than natural wood and may not have the same level of natural beauty. The lifespan of wood siding varies greatly depending on the type of wood, climate, and maintenance.
Metal Siding
Metal siding, including aluminum and steel, is exceptionally durable and resistant to fire, insects, and rot. It’s also low-maintenance, requiring only occasional cleaning. However, metal siding can dent or scratch more easily than other materials. Installation can be challenging due to the material’s rigidity and the need for specialized tools and expertise. Aluminum siding is lighter and more affordable than steel, but steel offers greater durability and strength. The modern aesthetic of metal siding can be a significant advantage for contemporary homes.
Source: cloudinary.com
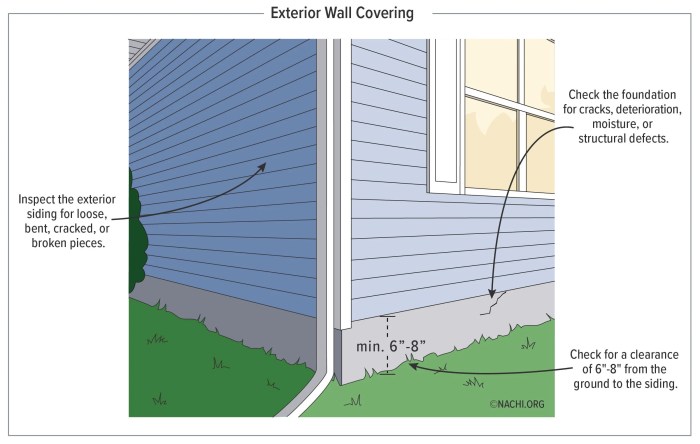
Replacing your exterior siding is a significant undertaking, but proper preparation is key to a successful and long-lasting result. This section details the steps involved in safely removing existing siding, preparing the underlying structure, and ensuring a solid foundation for your new siding. Careful attention to detail at this stage will prevent future problems and save you time and money in the long run.
Removing old siding can be physically demanding and potentially hazardous. Always prioritize safety and use appropriate personal protective equipment (PPE).
Siding Removal Techniques
Safe and efficient siding removal begins with the right tools and a methodical approach. Start by carefully assessing the type of siding you’re removing – wood, vinyl, aluminum, or fiber cement – as each material requires slightly different techniques. Essential tools include a pry bar (various sizes), hammer, utility knife, safety glasses, work gloves, and a ladder (if necessary). Begin at a corner or inconspicuous area to practice your technique. Work slowly and methodically, avoiding sudden or forceful movements that could damage the underlying sheathing or injure you. For vinyl siding, carefully pry at the bottom edge of a panel, working your way up to release the interlocking tabs. Wood siding often requires more force and may need to be cut into smaller sections for easier removal. Always wear safety glasses to protect your eyes from flying debris.
Sheathing Inspection and Repair
Once the old siding is removed, thoroughly inspect the underlying sheathing for damage. Look for rot, water damage, insect infestation, or loose boards. Any damaged sheathing must be repaired or replaced before installing new siding. Replace rotted or damaged sections with new sheathing material, ensuring proper nailing and fastening. Fill any gaps or cracks with exterior-grade caulk or sealant to prevent moisture penetration. Addressing these issues now prevents costly problems down the road. For example, a small area of rot left untreated could lead to extensive structural damage.
Wall Surface Preparation
Proper preparation of the wall surface is crucial for a successful siding installation. Begin by cleaning the sheathing thoroughly to remove dirt, debris, loose paint, and any remaining adhesive from the old siding. A pressure washer can be helpful, but use caution to avoid damaging the underlying sheathing. Next, address any moisture issues. Ensure proper drainage around the foundation and repair any leaks or cracks in the house’s exterior. This is critical to prevent moisture from getting trapped behind the new siding and causing rot or mold. Apply a water-resistant barrier, such as a housewrap, over the sheathing to further protect against moisture.
Ventilation Considerations
Adequate ventilation behind the siding is essential to prevent moisture buildup and extend the life of your new siding. Ensure there is sufficient space between the sheathing and the new siding to allow for airflow. This space should be at least ½ inch, depending on the type of siding. Proper ventilation also helps prevent the growth of mold and mildew. Consider using vented house wrap or adding ventilation channels to ensure adequate airflow. Remember, stagnant air traps moisture, so good ventilation is crucial.
Pre-Installation Checklist
A comprehensive checklist ensures a smooth and efficient siding replacement project. Protecting your landscaping and windows is crucial to minimize damage and maintain the overall aesthetic appeal of your property.
- Protect landscaping: Cover plants and shrubs with drop cloths or plastic sheeting to protect them from debris and damage.
- Protect windows: Cover windows with protective film or masking tape to prevent scratches or damage during the siding removal and installation process.
- Secure loose items: Remove or secure any loose items such as hanging flower pots or outdoor furniture that could be damaged or cause injury.
- Remove existing siding: Follow the steps outlined above for safe and efficient siding removal.
- Inspect and repair sheathing: Thoroughly inspect the underlying sheathing for damage and make necessary repairs.
- Clean and prepare the wall surface: Clean the sheathing and address any moisture issues.
- Install water-resistant barrier: Apply a housewrap to protect against moisture.
- Ensure adequate ventilation: Create sufficient space for airflow behind the new siding.
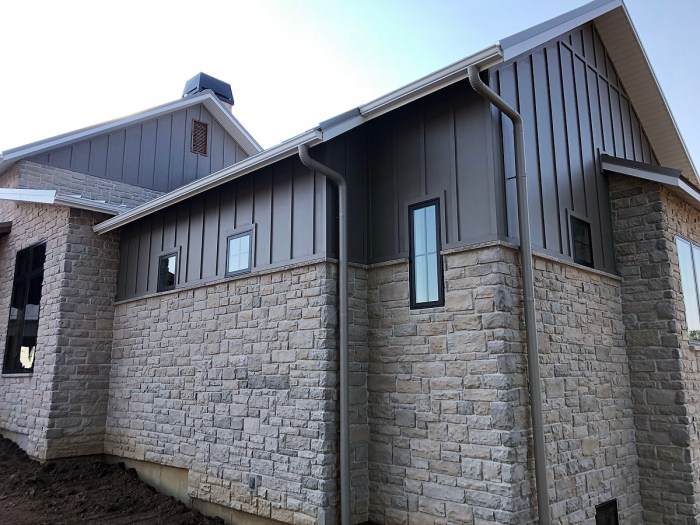
Siding Installation Techniques
Installing new siding can significantly improve your home’s curb appeal and energy efficiency. Proper installation is key to ensuring longevity and preventing future problems. This section details the techniques for installing various siding materials, emphasizing best practices for a successful project.
Vinyl Siding Installation
Vinyl siding is a popular choice due to its affordability and ease of installation. Installation involves overlapping each piece to create a weathertight barrier. Start at a corner and work your way across, ensuring proper alignment and overlap. Fastening is typically done using stainless steel nails, driven slightly below the surface to allow for expansion and contraction. Overlapping should be consistent and according to the manufacturer’s instructions, usually about an inch. Nails should be placed near the top and bottom of each panel, and slightly off-center to prevent splitting. J-channel and other trim pieces are crucial for creating clean lines and protecting the edges.
Fiber Cement Siding Installation
Fiber cement siding offers superior durability and fire resistance. However, its weight and size require careful handling and cutting. Large panels are usually installed horizontally, starting from the bottom. Precise cuts are essential, often requiring a wet saw to prevent dust and chipping. Appropriate safety gear, including eye protection and a dust mask, is mandatory. Fastening involves using corrosion-resistant nails or screws, ensuring they are driven straight to prevent cracking. Proper spacing between fasteners is vital to accommodate expansion and contraction. Panels should be butted tightly together, and sealant may be used to fill small gaps.
Wood Siding Installation
Wood siding offers a classic and aesthetically pleasing look. Achieving a weathertight seal is crucial for preventing water damage. Installation typically involves overlapping boards vertically or horizontally, with the lower boards overlapping the upper ones. Proper flashing and caulking around windows and doors are vital. Wood siding should be treated with a water-resistant sealant to protect it from the elements. Fasteners should be galvanized or stainless steel to prevent rust. Careful attention to detail is crucial to ensure a durable and attractive finish. Gaps between boards should be consistent and according to the manufacturer’s specifications.
Metal Siding Installation
Metal siding, such as aluminum or steel, is known for its longevity and low maintenance. Installation involves securing panels to the sheathing using self-tapping screws or rivets. Proper expansion and contraction must be accounted for by leaving small gaps between panels. These gaps allow the metal to expand and contract with temperature changes without buckling or warping. End laps should be consistent and overlap according to manufacturer specifications. Overlapping panels should be secured to the underlying structure with the appropriate fasteners. Appropriate sealant should be applied to ensure a weathertight seal.
Common Siding Installation Mistakes to Avoid
Avoiding these common mistakes can save you time, money, and headaches:
- Vinyl Siding: Using the wrong type of nails, inconsistent overlapping, failing to use J-channel and other trim pieces properly.
- Fiber Cement Siding: Improper cutting techniques leading to chipping or cracking, using the wrong fasteners, insufficient spacing between fasteners.
- Wood Siding: Failing to properly seal the wood, inconsistent spacing between boards, using inappropriate fasteners.
- Metal Siding: Neglecting expansion and contraction gaps, using incorrect fasteners, improper overlapping of panels.
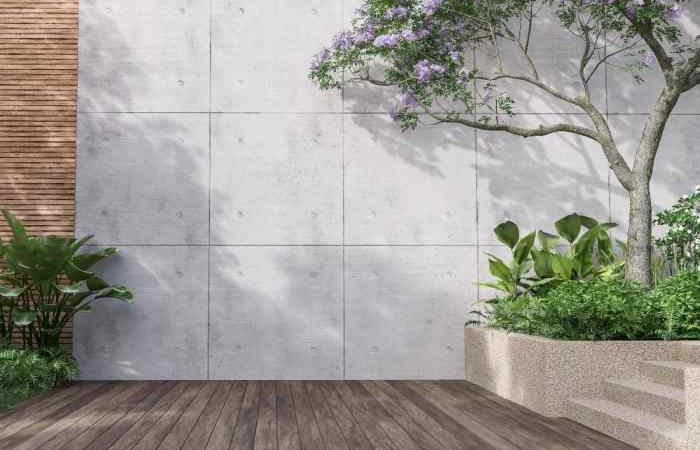
Cost Considerations and Budgeting
Source: tompkinsconstruction.com
Replacing your exterior siding is a significant investment, and understanding the cost factors is crucial for a smooth and financially responsible project. This section breaks down the key elements influencing the overall expense, helping you create a realistic budget and avoid unexpected costs.
Factors Influencing Siding Replacement Costs
Several factors significantly impact the final cost of your siding replacement project. These include the size of your home’s exterior surface area (larger homes naturally cost more), the complexity of the job (unusual architectural features or extensive repairs add to labor), the chosen siding material (prices vary wildly), the condition of the existing siding (extensive rot or damage requires more prep work), labor costs in your region (skilled labor is more expensive in some areas), and the need for permits and inspections (local regulations vary). Unexpected issues, such as discovering significant underlying damage during removal, can also inflate costs. A thorough inspection before beginning the project is highly recommended.
Cost Variations Between Siding Materials and Installation Methods
Siding material choice drastically affects the project’s cost. Vinyl siding is generally the most affordable option, offering a balance of cost-effectiveness and durability. Fiber cement siding, while more expensive upfront, boasts superior longevity and weather resistance. Wood siding, particularly high-end varieties, represents the most premium option, demanding higher initial investment and ongoing maintenance. Installation methods also influence cost. For instance, installing intricate designs or requiring significant modifications to the underlying structure will increase labor costs. Simple, straightforward installations on a well-maintained home will be significantly cheaper. For example, replacing siding on a 1500 sq ft ranch-style home with vinyl siding might cost between $8,000 and $15,000, while the same home with fiber cement siding could range from $15,000 to $30,000.
Obtaining Accurate Cost Estimates from Contractors
Getting multiple detailed estimates from reputable contractors is paramount. A trustworthy contractor will provide a comprehensive breakdown of costs, including materials, labor, permits, and potential unforeseen expenses. Be wary of unusually low bids, as they may indicate corners being cut. Ask for references and check online reviews to assess a contractor’s reputation and quality of work. Ensure the estimate includes a detailed description of the materials being used, the scope of work, and a clear payment schedule. A well-structured estimate should leave little room for surprises during the project.
Financing Options for Siding Replacement
Several financing options exist for home improvement projects like siding replacement. Home equity loans or lines of credit (HELOCs) use your home’s equity as collateral. Personal loans offer flexibility but typically come with higher interest rates. Credit cards can be used for smaller projects but may accrue significant interest if not paid off quickly. Finally, some contractors offer financing plans, often with promotional interest rates or deferred payment options. Carefully compare interest rates, fees, and repayment terms before selecting a financing option. Consider the long-term financial implications and choose the option that best suits your budget and financial situation. For instance, a $12,000 siding project financed over 5 years at 8% interest would result in significantly higher total payments compared to a 3-year loan at the same rate.
Sample Budget Breakdown for Siding Replacement, Replacing exterior siding
This is a sample budget for a medium-sized home (1,800 sq ft) with vinyl siding replacement. Costs will vary depending on location and specifics of the project.
| Item | Estimated Cost |
|---|---|
| Materials (Vinyl Siding, Trim, Flashing) | $6,000 – $8,000 |
| Labor (Removal, Installation, Cleanup) | $4,000 – $6,000 |
| Permits and Inspections | $500 – $1,000 |
| Contingency (Unforeseen Expenses) | $1,000 – $2,000 |
| Total Estimated Cost | $11,500 – $17,000 |
Maintaining New Siding
Source: futurecdn.net
Keeping your newly installed siding looking great and lasting for years to come requires a little proactive maintenance. Regular cleaning and inspections are key to preventing costly repairs down the line and ensuring your investment retains its value and curb appeal. This section details how to care for different siding types and address common issues.
Cleaning and Maintaining Different Siding Types
Different siding materials require slightly different cleaning approaches. Aggressive cleaning methods suitable for some materials can damage others. For example, pressure washing, while effective on some sidings, can easily damage more delicate materials. Always check the manufacturer’s recommendations for your specific siding type before starting any cleaning project.
- Vinyl Siding: Vinyl siding is generally low-maintenance. Regularly hosing it down with a garden hose can remove loose dirt and debris. For tougher stains, use a solution of mild detergent and water, applying it with a soft-bristled brush and rinsing thoroughly. Avoid harsh chemicals or abrasive cleaners. A visual guide would show a person using a garden hose to rinse the siding followed by someone using a soft brush and a bucket of soapy water to scrub a stained area, finishing with a thorough rinsing.
- Wood Siding: Wood siding requires more attention than vinyl. Regularly inspect for signs of rot, insect damage, or cracks. Clean with a mild soap and water solution, using a soft brush. Power washing should be done carefully and with a low-pressure nozzle to avoid damaging the wood. A visual guide would depict someone inspecting the wood siding for damage, followed by someone gently scrubbing with a soft brush and soapy water, then rinsing. The final image shows someone applying a wood preservative.
- Fiber Cement Siding: Fiber cement siding is durable and relatively low-maintenance. Regular cleaning with a garden hose is usually sufficient. For stubborn stains, use a mild detergent and water solution and a soft brush. Avoid abrasive cleaners. A visual guide would show a person rinsing the siding with a hose, followed by someone using a soft brush and a bucket of soapy water to clean a stained area, concluding with thorough rinsing.
Identifying and Addressing Common Siding Problems
Early detection of problems is crucial for preventing costly repairs.
- Cracks: Cracks can be caused by settling, impact damage, or expansion and contraction of the material. Small cracks in vinyl siding can often be filled with caulk. Larger cracks or cracks in wood or fiber cement siding may require professional repair or replacement.
- Discoloration: Discoloration can result from mildew, algae, or simply weathering. Cleaning with a suitable solution often resolves discoloration. Persistent discoloration might indicate a more serious underlying problem.
- Insect Damage: Wood siding is susceptible to insect infestation. Regular inspections can help detect signs of infestation early on. Treatment may involve insecticide application or professional pest control services. Damaged wood may need to be replaced.
Regular Inspections to Prevent Costly Repairs
Regular inspections, ideally twice a year (spring and fall), are essential. Look for signs of damage, such as cracks, discoloration, loose or damaged siding, and insect infestation. Addressing minor issues promptly can prevent them from becoming major, and costly, problems. A visual guide might show a person inspecting the siding from the ground and a ladder, pointing out potential problem areas like cracks or loose pieces.
Repairing Minor Damage
Minor damage can often be repaired easily, saving you money on costly professional repairs.
- Vinyl Siding: Small cracks can often be filled with caulk matched to the siding color. Loose pieces can be re-attached using appropriate fasteners.
- Wood Siding: Minor cracks in wood siding can sometimes be filled with wood filler. Larger areas of damage may require replacing sections of siding. Always treat repaired areas with a wood preservative.
- Fiber Cement Siding: Small cracks can sometimes be filled with caulk or patching compound. Larger areas of damage usually require professional repair or replacement.
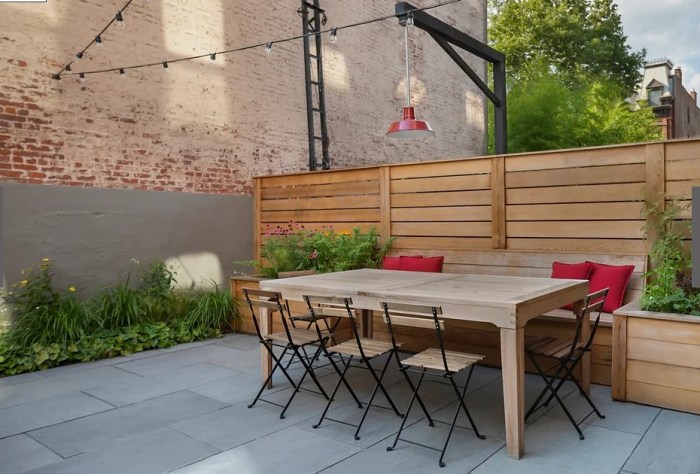
Ending Remarks
Source: landscapingbase.com
Updating your home’s exterior siding is a rewarding investment that boosts both aesthetics and property value. By carefully considering the factors Artikeld in this guide—from material selection and proper installation to ongoing maintenance—you can ensure a successful project and enjoy the beauty and protection of your new siding for many years. Remember to always prioritize safety and, when in doubt, consult with experienced professionals. Your updated home awaits!
Questions and Answers
How long does exterior siding typically last?
It varies greatly depending on the material. Vinyl can last 20-40 years, fiber cement 50+ years, wood 20-50 years (depending on the type and maintenance), and metal 30-50 years.
Do I need a permit to replace my siding?
Check with your local building department. Permits are often required for major exterior renovations.
Can I replace siding myself, or should I hire a contractor?
While DIY is possible for some siding types, hiring a professional ensures proper installation and warranty coverage. Consider your skills and the complexity of the job.
What’s the best time of year to replace siding?
Spring or fall are generally ideal. Avoid extreme heat or cold for optimal installation and material performance.
How do I clean different types of siding?
Vinyl siding can usually be cleaned with a mild soap and water solution. Wood siding might require a pressure washer (used carefully) and a specialized wood cleaner. Always check manufacturer recommendations.
Comments are closed.