Replacing Cedar Shake Siding A Comprehensive Guide
Replacing cedar shake siding is a significant home improvement project, impacting both aesthetics and longevity. This guide dives into the process, covering everything from choosing the right replacement material to managing the budget and tackling potential installation hurdles. We’ll explore various options, their pros and cons, and provide practical advice to ensure a smooth and successful renovation.
From understanding the cost implications of different materials and labor to mastering the installation techniques, we’ll equip you with the knowledge to make informed decisions. We’ll also address common problems encountered during the replacement process, offering preventative measures and solutions for a worry-free experience. Get ready to transform your home’s exterior!
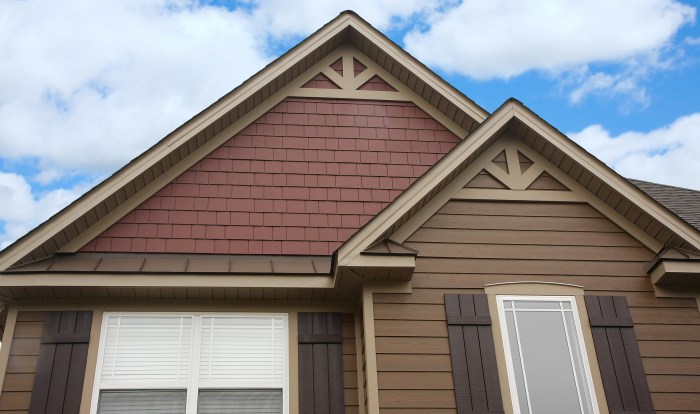
Types of Cedar Shake Siding Replacements
Source: directcedarsupplies.com
Replacing cedar shake siding offers a chance to upgrade your home’s exterior with a material that better suits your budget, maintenance preferences, and aesthetic goals. Many excellent alternatives exist, each with its own set of advantages and disadvantages. Choosing the right replacement depends heavily on your priorities.
Cedar Shake Siding Replacement Materials
Selecting a suitable replacement for cedar shake siding involves careful consideration of several factors. The following table summarizes some common alternatives, highlighting their key characteristics.
| Material | Durability | Cost | Maintenance |
|---|---|---|---|
| Fiber Cement Siding | Very High – Resistant to rot, insects, and fire | Medium to High | Low – Requires occasional cleaning |
| Vinyl Siding | High – Durable and weather-resistant | Low to Medium | Low – Easy to clean, minimal upkeep |
| Engineered Wood Siding | Medium to High – More durable than natural wood, but less than fiber cement | Medium | Low to Medium – Requires occasional cleaning and potential repainting |
| Metal Siding (Aluminum or Steel) | Very High – Extremely durable and long-lasting | Medium to High | Low – Requires minimal maintenance |
| Stone Veneer | Very High – Extremely durable and long-lasting | High | Low – Minimal maintenance required |
Pros and Cons of Cedar Shake Siding Replacements
Each material presents a unique set of advantages and disadvantages.
Fiber cement siding boasts exceptional durability and fire resistance, making it a popular choice. However, it’s more expensive than vinyl and requires professional installation. Vinyl siding is budget-friendly and low-maintenance, but it may not offer the same aesthetic appeal as natural cedar. Engineered wood siding provides a balance between cost and durability, but it still requires more maintenance than vinyl or fiber cement. Metal siding offers unparalleled durability and longevity, but its cost and potential for dents are considerations. Stone veneer is visually stunning and exceptionally durable, but it’s the most expensive option and requires specialized installation.
Aesthetic Comparison to Cedar Shake Siding
The aesthetic appeal of replacement materials varies significantly. Fiber cement siding can mimic the look of wood, offering a similar texture and appearance. Vinyl siding comes in a wide range of colors and styles, but it might lack the natural, rustic charm of cedar shakes. Engineered wood siding provides a similar look to natural wood, though often with a slightly more uniform appearance. Metal siding offers a modern, clean look that contrasts sharply with the traditional aesthetic of cedar shakes. Stone veneer provides a completely different aesthetic, offering a more rugged and substantial look. Ultimately, the best choice depends on your personal preferences and the overall style of your home.
Cost Considerations for Replacement
Source: storables.com
Replacing cedar shake siding is a significant investment, and understanding the cost factors is crucial for budgeting and planning. Several key elements contribute to the overall expense, and careful consideration of these factors will help you make informed decisions throughout the process. This section will break down the major cost components and offer strategies for managing your budget effectively.
Material Costs
Material costs represent a substantial portion of the total project expense. The type of replacement siding you choose will significantly impact this cost. For instance, high-end synthetic shakes mimicking the look of cedar will be more expensive than standard vinyl or fiber cement options. The quantity of materials needed, determined by the square footage of your house and any additional features like dormers or complex rooflines, will also play a role. Finally, the price of materials can fluctuate based on market conditions and availability, so it’s wise to get multiple quotes from suppliers.
Labor Costs
Labor costs are another major expense. The complexity of the job, such as the presence of intricate architectural details or difficult-to-access areas, will influence the amount of time and therefore the cost of labor. The experience and reputation of the contractor also affect labor costs; experienced, highly-rated contractors typically charge more than less experienced ones. The prevailing wage rates in your area will also factor into the overall labor cost. Remember to factor in potential costs for additional labor, such as scaffolding rental and disposal of old siding.
Permitting Costs
Obtaining the necessary permits from your local authorities is a crucial, though often overlooked, cost component. Permit fees vary significantly depending on your location and the scope of the project. It’s best to contact your local building department early in the planning process to determine the exact costs and requirements. Failure to obtain the proper permits can result in significant fines and delays.
Sample Budget Breakdown for a 1500 sq ft House
Let’s consider a hypothetical scenario for a 1500 sq ft house. This is a rough estimate, and actual costs can vary significantly depending on the factors mentioned above.
| Cost Category | Estimated Cost | Percentage of Total |
|---|---|---|
| Materials (Synthetic Shake Siding) | $15,000 | 40% |
| Labor | $15,000 | 40% |
| Permits and Inspections | $1,000 | 3% |
| Waste Removal and Cleanup | $1,000 | 3% |
| Contingency (for unforeseen expenses) | $3,000 | 8% |
| Total Estimated Cost | $35,000 | 100% |
This budget assumes the use of mid-range synthetic shake siding. Choosing less expensive materials or doing some of the prep work yourself could significantly lower the total cost.
Strategies for Minimizing Costs, Replacing cedar shake siding
Several strategies can help minimize the overall cost of your cedar shake siding replacement. One effective approach is to obtain multiple quotes from different contractors, allowing you to compare pricing and services. Another strategy is to carefully consider the timing of your project; prices for materials and labor can fluctuate seasonally. Finally, choosing less expensive but still durable materials, such as vinyl or fiber cement siding, can significantly reduce the overall cost without sacrificing quality. Careful planning and research can make a significant difference in managing the budget for this home improvement project.
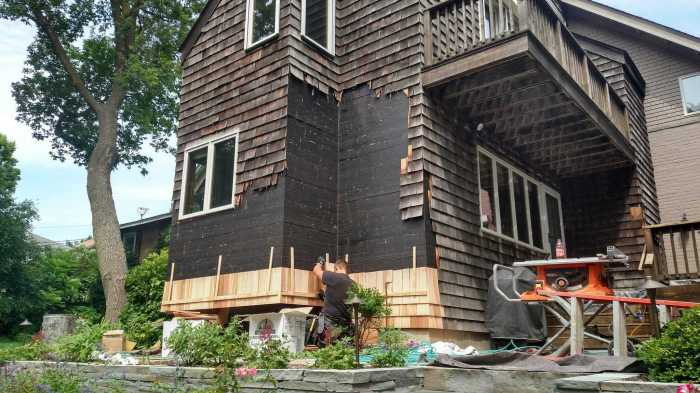
Installation Methods and Techniques
Source: statelineext.com
Replacing cedar shake siding requires careful planning and execution, regardless of the chosen replacement material. The specific installation methods will vary depending on the material, but all share some common principles of proper preparation, accurate measurement, and secure fastening. Understanding these techniques is crucial for a long-lasting and aesthetically pleasing result.
Vinyl Siding Installation
Vinyl siding offers a relatively straightforward installation process. It’s durable, low-maintenance, and comes in a variety of styles and colors to mimic the look of wood. Proper installation ensures a weathertight and attractive finish.
- Preparation: Begin by removing the old cedar shake siding, ensuring the underlying sheathing is sound and free of rot or damage. Repair any necessary areas before proceeding.
- Framing and Sheathing Inspection: Check for any structural issues with the underlying wall framing. Repair or replace any damaged or rotten wood. Ensure the sheathing is properly secured and level.
- Starter Strip Installation: Install a starter strip along the bottom edge of the wall, providing a level base for the first row of siding.
- Siding Installation: Begin installing the vinyl siding panels from the bottom, overlapping each panel according to the manufacturer’s instructions. Use appropriate nails or screws to secure each panel.
- J-Channel and Corner Trim: Use J-channel to finish the edges and corners, ensuring a clean and professional look.
- Finishing Touches: Install any necessary trim pieces, such as window and door casings.
Necessary Tools and Equipment: Measuring tape, level, utility knife, hammer or nail gun, saw (circular or hand saw), safety glasses, work gloves, and appropriate fasteners.
Fiber Cement Siding Installation
Fiber cement siding provides a durable and fire-resistant alternative to cedar shake. It’s known for its longevity and resistance to rot and insects. However, it requires more precision during installation.
- Preparation: Similar to vinyl siding installation, remove the old cedar shake siding and inspect the underlying sheathing for damage. Repair any necessary areas.
- Sheathing Preparation: Ensure the sheathing is properly secured and level. Fiber cement siding is heavier than vinyl, so extra attention to structural integrity is necessary.
- Water-Resistant Barrier: Install a water-resistant barrier over the sheathing to protect against moisture damage.
- Siding Installation: Begin installing the fiber cement panels from the bottom, using appropriate fasteners and spacing according to the manufacturer’s instructions. Pre-drilling pilot holes is recommended to prevent cracking.
- Trim and Finishing: Install trim pieces and flashing as needed, ensuring proper water management.
Necessary Tools and Equipment: Measuring tape, level, circular saw with a fine-toothed blade, drill with appropriate drill bits, safety glasses, respirator (fiber cement dust is irritating), work gloves, and appropriate fasteners.
Engineered Wood Siding Installation
Engineered wood siding offers a blend of affordability and durability. It’s often a good compromise between the cost of vinyl and the performance of fiber cement.
- Preparation: Remove the old cedar shake siding and inspect the underlying sheathing. Repair any damage found.
- Sheathing and Vapor Barrier: Ensure the sheathing is properly secured and level. Consider installing a vapor barrier to minimize moisture problems.
- Siding Installation: Install the engineered wood siding according to the manufacturer’s instructions, using appropriate fasteners. Pay close attention to proper overlap and spacing.
- Caulking and Sealing: Caulk all seams and joints to create a weathertight seal.
- Finishing Touches: Install any necessary trim pieces and flashing.
Necessary Tools and Equipment: Measuring tape, level, circular saw or hand saw, drill, safety glasses, work gloves, caulking gun, and appropriate fasteners.
Maintenance and Lifespan of Replacement Materials
Choosing a replacement siding material involves considering not only initial cost but also long-term maintenance needs and lifespan. Different materials require varying levels of upkeep, impacting both your time and budget over the years. Understanding these differences is crucial for making an informed decision. This section details the maintenance requirements and expected lifespans of common cedar shake siding replacements.
Maintenance Requirements for Different Siding Materials
Proper maintenance significantly extends the life of your siding and maintains its aesthetic appeal. Neglecting maintenance can lead to premature deterioration and costly repairs. The following articles are the typical maintenance needs for several popular replacement options.
- Vinyl Siding: Vinyl siding is relatively low-maintenance. Regular cleaning with a hose and mild detergent removes dirt and grime. Occasional spot cleaning with a soft brush may be needed for stubborn stains. Repairs typically involve replacing damaged sections, a relatively straightforward process. Repainting is not necessary.
- Fiber Cement Siding: Fiber cement is durable and requires minimal maintenance. Similar to vinyl, regular cleaning with water and a soft brush is sufficient. Repairs, while more involved than vinyl, are still manageable with the right tools and skills. Painting is typically required every 10-15 years, depending on exposure to the elements.
- Aluminum Siding: Aluminum siding is extremely durable and weather-resistant, requiring only occasional washing to remove dirt and debris. Scratches can be touched up with paint, but major repairs are rarely needed. Repainting may be desirable for aesthetic reasons after many years, but it is not a necessity for functionality.
- Engineered Wood Siding: Engineered wood siding, like fiber cement, benefits from periodic cleaning with water and a soft brush. It’s crucial to address any signs of damage promptly to prevent water intrusion. Repainting is usually necessary every 5-7 years, depending on the paint quality and environmental conditions.
Lifespan Comparison of Replacement Materials
The lifespan of siding materials varies greatly depending on factors like climate, installation quality, and maintenance practices. However, general estimates provide a useful comparison.
| Material | Expected Lifespan (Years) |
|---|---|
| Vinyl Siding | 30-50 |
| Fiber Cement Siding | 50-80+ |
| Aluminum Siding | 50+ |
| Engineered Wood Siding | 25-40 |
Note that these are estimates, and actual lifespans can vary significantly. Proper maintenance significantly extends the life of any siding material.
Recommended Maintenance Schedules
A regular maintenance schedule prevents minor issues from becoming major problems, saving you money and extending the life of your siding.
| Material | Annual Maintenance | Every 3-5 Years | Every 10-15 Years |
|---|---|---|---|
| Vinyl Siding | Cleaning with water and mild detergent | Inspection for damage; minor repairs | N/A |
| Fiber Cement Siding | Cleaning with water and a soft brush | Inspection for damage; minor repairs | Repainting |
| Aluminum Siding | Cleaning with water | Inspection for damage; minor repairs (paint touch-ups) | N/A |
| Engineered Wood Siding | Cleaning with water and a soft brush | Inspection for damage; minor repairs | Repainting |
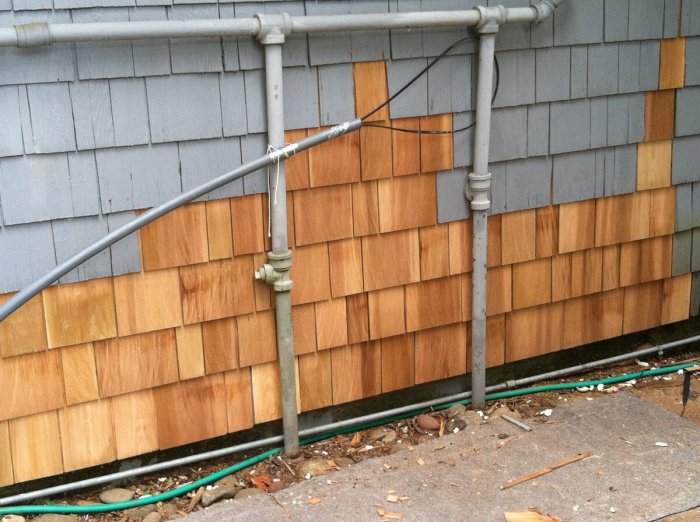
Visual Examples of Replacement Projects
Seeing is believing, and when it comes to choosing a replacement for your cedar shake siding, seeing real-world examples can be invaluable. The following examples illustrate how different siding materials can transform the look and feel of a home, complementing its architectural style and enhancing its curb appeal. We’ll explore three distinct homes, each showcasing a unique approach to siding replacement.
Victorian Home with Fiber Cement Shakes
Imagine a charming Victorian home, characterized by its intricate detailing, gingerbread trim, and steeply pitched roof. Its original cedar shake siding, though beautiful, had become weathered and damaged. The homeowner opted for fiber cement shakes in a deep, charcoal gray. These shakes mimicked the texture and profile of the original cedar, maintaining the home’s historic character. The dark gray siding provided a striking contrast against the lighter-colored trim and window frames, highlighting the home’s architectural details. The fiber cement material offered durability and low maintenance, a significant improvement over the original cedar. The overall effect was a revitalized Victorian beauty, retaining its historical charm while gaining modern resilience.
Ranch Home with Vinyl Siding
A mid-century ranch home, with its low-pitched roof and simple lines, presented a different challenge. The original cedar shake siding had become worn and needed replacing. The homeowners chose a vinyl siding in a warm, earthy tone, reminiscent of natural wood. The smooth, clean lines of the vinyl siding complemented the ranch’s minimalist aesthetic. The color choice, a light taupe, helped to visually expand the home’s footprint and gave it a fresh, contemporary feel without sacrificing its mid-century charm. The low-maintenance nature of vinyl was a key factor in the homeowner’s decision, offering a practical solution for a busy family. The result was a modern update that respected the home’s original design.
Cape Cod Home with Engineered Wood Siding
A classic Cape Cod home, known for its symmetrical facade and cozy proportions, needed siding repair. The original cedar shakes were showing significant age. Here, the homeowners selected engineered wood siding in a creamy white. This choice beautifully complemented the home’s traditional style and created a clean, crisp look. The engineered wood provided a durable and aesthetically pleasing alternative to cedar, offering a similar natural wood appearance while requiring less maintenance. The light color choice enhanced the home’s bright, airy feel, while the siding’s texture added subtle visual interest without overwhelming the home’s understated elegance. The overall effect was a refreshed and updated look that maintained the Cape Cod’s inherent charm and character.
Addressing Potential Issues During Replacement
Replacing cedar shake siding is a significant undertaking, and unforeseen problems can arise if not properly addressed. Careful planning and preparation are crucial for a smooth and successful project, minimizing both cost overruns and potential hazards. This section highlights common issues and provides preventative measures and solutions.
Proper preparation and planning are paramount to avoid common pitfalls during cedar shake siding replacement. Failing to account for these factors can lead to delays, increased costs, and subpar results. Thorough planning encompasses everything from material selection and accurate measurements to securing necessary permits and arranging for waste disposal.
Underlying Structural Issues
Before beginning any siding replacement, a thorough inspection of the underlying structure—the walls themselves—is essential. Rotting wood, insect infestation, or water damage must be addressed before installing new siding. Ignoring these issues will simply encapsulate the problem, leading to further deterioration and potentially costly repairs down the line. This often involves replacing damaged sections of sheathing or framing, ensuring a solid foundation for the new siding. For example, if significant rot is discovered near a window, replacing the affected framing and adding proper flashing are critical to prevent future water intrusion.
Improper Installation Techniques
Incorrect installation can compromise the longevity and aesthetic appeal of the new siding. Issues such as inconsistent spacing, improper nailing, or failure to use appropriate flashing around windows and doors can lead to water penetration, causing rot and premature failure of the siding. Using the correct type and size of nails, following manufacturer’s instructions for installation, and employing proper flashing techniques are crucial for preventing these problems. A common example is using nails that are too short, which won’t properly secure the shakes and can lead to wind damage.
Environmental Considerations
Cedar shake siding replacement generates significant waste, primarily in the form of old siding and packaging materials. Proper waste disposal is crucial to minimize environmental impact. Recycling or responsible disposal of materials is not only environmentally responsible but may also be required by local regulations. Furthermore, dust and debris generated during removal and installation should be managed to avoid impacting neighboring properties or the environment. Utilizing appropriate safety equipment, such as dust masks and eye protection, is crucial for both worker and environmental safety. For example, a contractor might choose to use a dumpster for waste disposal instead of leaving debris on-site, and implement measures to contain dust during demolition.
Final Thoughts: Replacing Cedar Shake Siding
Ultimately, replacing cedar shake siding is a rewarding investment that enhances your home’s curb appeal and protects it from the elements. By carefully considering the factors Artikeld in this guide—material selection, budgeting, installation, and maintenance—you can confidently embark on this project and enjoy the results for years to come. Remember to plan thoroughly, prioritize quality materials, and consider seeking professional help when needed. Your updated home exterior awaits!
Query Resolution
Can I replace cedar shake siding myself?
While possible for smaller areas with simpler designs, replacing cedar shake siding is often a complex job best left to experienced professionals. The steepness of the roof and the intricacies of the installation can make DIY attempts challenging and potentially unsafe.
How long does cedar shake siding replacement take?
The timeframe varies depending on the house size, material chosen, and weather conditions. Expect several days to a few weeks for a typical home. Professional contractors can provide a more accurate estimate based on your specific project.
What permits do I need?
Building permits are usually required for exterior renovations of this scale. Check with your local building department for specific requirements in your area. Failure to obtain necessary permits can result in fines or legal issues.
How do I choose the right color for my new siding?
Consider your home’s architectural style, surrounding landscape, and personal preferences. Sample paint colors on different areas of your home in various lighting conditions to see how they look before committing to a large purchase.
What about insurance coverage during the project?
It’s crucial to ensure your homeowner’s insurance covers potential damages during the replacement process. Inform your insurer about the project beforehand to avoid any coverage disputes later.
Comments are closed.