Cedar Siding Maintenance A Complete Guide
Cedar siding maintenance is key to preserving your home’s beauty and value. This natural wood offers a stunning aesthetic, but requires specific care to thrive. Understanding how to clean, repair, and protect your cedar siding will extend its lifespan significantly, saving you money on costly replacements down the line. We’ll cover everything from routine cleaning and inspections to tackling more serious issues like mildew and rot.
This guide provides a practical, step-by-step approach to maintaining your cedar siding, from identifying early signs of trouble to employing effective repair techniques. We’ll also explore preventative measures to protect your investment and keep your home looking its best for years to come. Whether you’re a seasoned DIYer or a homeowner tackling your first maintenance project, this guide has you covered.
Introduction to Cedar Siding
Cedar siding is a popular choice for homeowners seeking a natural, aesthetically pleasing, and durable exterior finish. Its rich reddish-brown tones and distinct grain patterns add a touch of rustic elegance to any home, while its inherent properties contribute to its longevity and performance. This section will explore the characteristics, benefits, drawbacks, and lifespan of cedar siding.
Cedar siding’s popularity stems from a combination of factors. It’s a naturally beautiful material, offering a warm and inviting appearance that complements many architectural styles. Furthermore, cedar is relatively lightweight, making installation easier and less stressful on the home’s structure. Its naturally high resistance to rot and insect infestation further enhances its appeal.
Cedar Siding Benefits and Drawbacks
Cedar siding offers several advantages, including its natural beauty, durability, and relatively low maintenance needs compared to other materials. Its insulating properties can contribute to energy efficiency, reducing heating and cooling costs. However, cedar is more expensive than vinyl or fiber cement siding, and it requires periodic maintenance to prevent premature deterioration. Exposure to the elements can lead to weathering and fading, requiring occasional cleaning and treatment. Furthermore, cedar is susceptible to damage from moisture if not properly installed and maintained. While naturally resistant to rot and insects, untreated cedar can be vulnerable.
Cedar Siding Lifespan
With proper installation and regular maintenance, cedar siding can last for 30 to 50 years, or even longer. This lifespan can vary depending on several factors, including climate, exposure to sunlight, and the quality of the initial installation and subsequent maintenance. For example, a home in a consistently humid climate might require more frequent maintenance than one in a dry climate. Similarly, homes with significant sun exposure might experience more rapid fading and weathering. Regular cleaning, staining, or sealing every 3-5 years will significantly extend the life of the cedar siding. Neglecting maintenance can lead to premature deterioration, reducing the lifespan considerably. A well-maintained cedar sided home in a favorable climate could easily surpass the 50-year mark, while a neglected home in a harsh climate might see significant issues within 20 years.
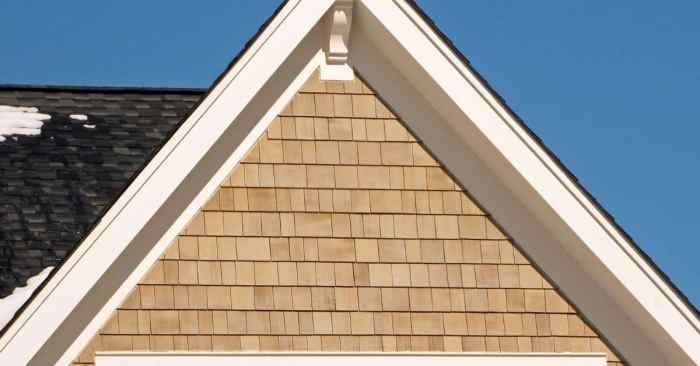
Regular Cleaning and Inspection
Source: carpentinglab.com
Keeping your cedar siding looking its best and extending its lifespan requires regular cleaning and careful inspection. Neglecting these tasks can lead to premature deterioration, costly repairs, and a less attractive home exterior. A proactive approach will save you time, money, and headaches in the long run.
Cleaning Cedar Siding
Regular cleaning removes dirt, mildew, and other debris that can damage the wood and dull its natural beauty. The frequency of cleaning depends on your climate and environment; areas with heavy pollen or pollution may require more frequent cleaning. Generally, cleaning once or twice a year is sufficient for most locations.
- Prepare the area: Clear the area around your house of any obstacles that could be damaged by water or cleaning solutions. This includes plants, furniture, and other items. Cover nearby landscaping with tarps or drop cloths to prevent staining.
- Choose your cleaning solution: A simple solution of mild dish soap and water is often sufficient for routine cleaning. For more stubborn mildew or algae, a mixture of water and oxygen bleach (following product instructions carefully) can be effective. Avoid harsh chemicals or pressure washers, as they can damage the cedar. Always test any cleaning solution on a small, inconspicuous area first to ensure it doesn’t damage the finish.
- Apply the solution: Use a soft-bristled brush or a long-handled scrub brush to apply the cleaning solution to the siding. Work in small sections, scrubbing gently to avoid damaging the wood. A garden sprayer can help distribute the solution evenly.
- Rinse thoroughly: Once you’ve scrubbed the entire area, rinse the siding thoroughly with clean water from a garden hose. Ensure all traces of soap or cleaning solution are removed to prevent staining or damage. Allow the siding to air dry completely.
Identifying Early Signs of Damage
Early detection of damage is crucial for preventing more extensive and costly repairs. Regular inspections allow you to address minor issues before they become major problems.
- Check for cracks and splits: Examine the siding for any cracks, splits, or checks in the wood. These can be caused by age, weathering, or insect infestation.
- Look for rot or decay: Soft, spongy areas or discoloration may indicate rot or decay. These areas should be addressed promptly to prevent further spread.
- Inspect for insect damage: Look for signs of insect infestation, such as holes, sawdust, or insect activity. Cedar is susceptible to certain insects, and early detection is essential for effective treatment.
- Note any loose or damaged siding: Check for any siding that is loose, damaged, or falling away from the house. This may require repair or replacement.
- Assess paint or stain condition: If your cedar siding is painted or stained, check for peeling, chipping, or fading. This may indicate the need for repainting or restaining.
Cedar Siding Inspection Checklist
A regular inspection schedule will help you catch problems early and prevent costly repairs. Aim for at least two inspections per year, once in spring and once in autumn.
| Area | Frequency | What to Check |
|---|---|---|
| Entire House Exterior | Semi-annually (Spring & Autumn) | Overall condition, signs of damage, loose siding, insect activity |
| Foundation and Ground Level | Semi-annually (Spring & Autumn) | Moisture damage, rot, insect activity |
| Corners and Edges | Semi-annually (Spring & Autumn) | Cracks, splits, loose boards |
| Soffits and Fascia | Semi-annually (Spring & Autumn) | Rot, insect damage, water damage |
| Flashing and Caulking | Annually | Proper sealing, gaps, deterioration |
Addressing Common Cedar Siding Issues

Source: prosuperiorconstruction.com
Cedar siding, while beautiful and durable, is susceptible to certain problems. Understanding these issues and how to address them is key to maintaining the longevity and aesthetic appeal of your home’s exterior. Neglecting these problems can lead to costly repairs down the line, so proactive maintenance is crucial.
Mildew and Algae Growth
Mildew and algae thrive in damp, shady environments. These organisms appear as dark streaks, spots, or a general discoloration on the cedar siding. Prolonged exposure to moisture, poor air circulation, and lack of sunlight create ideal breeding grounds. The effects range from unsightly staining to the potential degradation of the wood’s protective oils, leading to premature weathering and decay. Treating mildew and algae involves a two-pronged approach: cleaning and prevention.
Treating Mildew and Algae
Cleaning involves using a solution of mild detergent and water, applied with a soft-bristled brush. For more stubborn growth, a mixture of bleach and water (typically a 1:10 ratio of bleach to water – always test in an inconspicuous area first!) can be effective. Remember to always wear protective gear like gloves, eye protection, and a respirator when working with bleach. After scrubbing, rinse thoroughly with clean water to remove all traces of the cleaning solution. Prevention involves improving air circulation around the house, trimming overhanging branches that shade the siding, and regularly cleaning the siding to prevent buildup.
Insect Infestation
Cedar siding can be susceptible to various insect infestations, including carpenter ants, termites, and powderpost beetles. These insects can bore into the wood, causing structural damage and weakening the siding. The effects range from cosmetic blemishes to significant structural compromise, potentially leading to costly repairs or even replacement. Early detection is crucial for minimizing damage. Signs of infestation include small holes in the wood, sawdust-like frass (insect droppings), and unusual sounds coming from within the walls.
Preventative Treatments for Insect Damage
Several preventative measures can help protect your cedar siding from insect infestations. These include regular inspections for signs of infestation, proper ventilation to reduce moisture buildup (a breeding ground for insects), and the application of insecticidal treatments. Different preventative treatments exist, each with its pros and cons. For example, borate treatments offer long-term protection by making the wood less palatable to insects. However, these treatments require professional application and may not be suitable for all types of cedar. Alternatively, using insect repellents can provide a shorter-term solution, requiring more frequent applications. The best approach often involves a combination of preventative measures tailored to your specific climate and the type of insects prevalent in your area. Consulting with a pest control professional is advisable for serious infestations or to determine the best preventative strategy for your home.
Repairing Damaged Cedar Siding: Cedar Siding Maintenance
Cedar siding, while durable, is susceptible to damage from weather, insects, and general wear and tear. Regular maintenance, as discussed previously, helps prevent major issues, but repairs will sometimes be necessary. This section details how to address common damage types.
Repairing Minor Cracks and Splits
Minor cracks and splits in cedar siding can often be repaired without replacing the entire board. For small cracks, wood filler is an effective solution. Choose a high-quality exterior-grade wood filler that matches the color of your siding as closely as possible. Clean the crack thoroughly, apply the filler, let it dry completely, and then sand smooth for a seamless finish. For slightly larger splits, you may need to use wood glue in addition to the filler to ensure a strong bond. Always follow the manufacturer’s instructions for drying times and sanding. A final coat of exterior-grade paint or stain will blend the repair with the surrounding siding.
Replacing Damaged or Rotten Cedar Siding Boards
More extensive damage, such as rot or significant splitting, requires replacing the affected board. This process involves carefully removing the damaged board, measuring the replacement, and installing the new board using appropriate fasteners. Before starting, ensure you have the necessary tools, including a pry bar, hammer, measuring tape, saw, and appropriate nails or screws. Remember to always wear safety glasses and gloves. Precise measurements are crucial for a proper fit. The new board should be secured using galvanized nails or exterior-grade screws, driven in at an angle to prevent splitting. Finally, caulk any gaps to prevent water penetration.
Caulking Gaps and Seams in Cedar Siding
Caulking gaps and seams is essential for preventing water damage and extending the life of your cedar siding. Proper caulking creates a waterproof barrier, protecting the wood from moisture and preventing rot. Before caulking, clean the area thoroughly to ensure proper adhesion. Apply the caulk smoothly and evenly, using a caulking gun. Smooth the caulk with a wet finger or a caulking tool to create a smooth, finished look.
| Material | Pros | Cons |
|---|---|---|
| Silicone Caulk | Excellent water resistance, durable, flexible | Can be difficult to paint over, may not adhere well to all surfaces |
| Acrylic Latex Caulk | Paintable, easy to apply, good adhesion | Less water resistant than silicone, may not be suitable for all climates |
| Butyl Rubber Caulk | Highly water resistant, excellent for expansion and contraction | Difficult to paint, can be messy to apply |
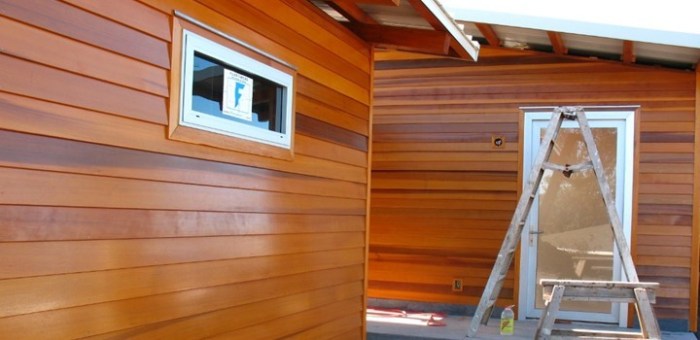
Protecting Cedar Siding from the Elements

Source: buffalo-lumber.com
Cedar siding, with its natural beauty, is susceptible to the damaging effects of sun, rain, and snow. Regular maintenance, including cleaning and inspection, is crucial, but applying a protective sealant or stain is the key to extending its lifespan and preserving its aesthetic appeal. This step creates a barrier against moisture, UV rays, and insects, preventing premature weathering and decay.
Protecting your cedar siding involves choosing the right product and applying it correctly. The type of sealant or stain you select will depend on the desired look and level of protection.
Sealant and Stain Types for Cedar Siding
The market offers a variety of sealants and stains specifically formulated for cedar. Understanding their differences is vital for making an informed choice. Oil-based stains penetrate deeply into the wood, enhancing its natural color and providing excellent protection against moisture. Water-based stains are easier to clean up, offer good UV protection, and are generally lower in VOCs (Volatile Organic Compounds), making them a more environmentally friendly option. Clear sealants protect without altering the cedar’s natural color, while pigmented sealants offer additional UV protection and can help to cover minor imperfections. Solid color stains completely hide the wood grain, providing a uniform, opaque finish. The best choice depends on personal preference and the desired outcome.
Applying Sealant or Stain to Cedar Siding
Proper application is as important as choosing the right product. Begin by thoroughly cleaning the siding to remove dirt, mildew, and loose debris. A pressure washer can be effective, but use caution to avoid damaging the wood. Allow the siding to dry completely before applying the sealant or stain. Follow the manufacturer’s instructions carefully regarding application methods and drying times. For best results, apply thin, even coats using a brush, roller, or sprayer, working in the direction of the wood grain. Multiple thin coats are generally preferable to one thick coat, ensuring even penetration and preventing runs or drips. Allow ample drying time between coats. Proper preparation and application will maximize the longevity of your sealant or stain, ensuring your cedar siding remains beautiful for years to come.
Long-Term Cedar Siding Maintenance Strategies
Source: craftingwithconcrete.com
A proactive approach to cedar siding maintenance is key to preserving its beauty and extending its lifespan. By establishing a regular maintenance schedule and addressing issues promptly, you can significantly reduce the risk of costly repairs down the line and ensure your home retains its curb appeal for years to come. This involves a combination of regular cleaning, thorough inspections, and preventative treatments.
Proper maintenance significantly increases the lifespan of your cedar siding. Untreated cedar, exposed to the elements, can degrade rapidly, requiring expensive repairs or even complete replacement within a decade. However, with a diligent maintenance plan, you can expect your cedar siding to last for 25 years or more, providing a substantial return on your investment in both aesthetics and property value.
Cedar Siding Maintenance Schedule
This schedule article recommends frequencies for various maintenance tasks. Adjustments may be necessary based on your climate and the specific conditions your siding faces (e.g., proximity to trees, heavy shade). Remember, prevention is always cheaper than cure.
| Task | Frequency | Notes |
|---|---|---|
| Cleaning (light wash) | Annually (Spring or Fall) | Removes dirt, pollen, and loose debris. |
| Inspection (thorough visual check) | Annually (after cleaning) | Identify any signs of damage, decay, or insect infestation. |
| Treatment (stain or sealant) | Every 3-5 years | Protects against moisture damage and UV degradation. Frequency depends on the product used and climate. |
| Repair (minor repairs) | As needed | Address any damaged or rotting boards promptly. |
| Major Repair/Replacement | Every 15-20 years (or as needed) | This will depend on the severity of damage and maintenance practices. |
Financial Benefits of Preventative Maintenance
Preventative maintenance significantly reduces long-term costs. For example, a single board replacement might cost around $50-$100, including labor and materials. However, neglecting maintenance could lead to widespread rot requiring the replacement of multiple boards or even entire sections of siding, costing thousands of dollars. A proactive approach saves money by preventing these larger, more expensive repairs. Consider a hypothetical scenario: annual cleaning costs $150, while a major repair due to neglected maintenance could cost $5000. The preventative approach offers substantial long-term savings.
Extending Cedar Siding Lifespan Through Maintenance
Regular cleaning removes dirt and grime, preventing the build-up of mildew and mold, which can accelerate wood decay. Annual inspections allow for early detection of problems, enabling prompt repairs before they become major issues. Preventative treatments such as staining or sealing protect the wood from moisture and UV damage, preserving its integrity and extending its lifespan. Promptly addressing minor issues, like replacing a damaged board, prevents further damage and saves on expensive future repairs. A well-maintained cedar siding can easily outlast a neglected one by a significant margin – potentially adding 10-15 years or more to its lifespan.
Illustrative Examples of Cedar Siding Maintenance
Let’s look at three real-world scenarios to illustrate different levels of cedar siding damage and how to address them. These examples demonstrate the range of maintenance tasks, from simple cleaning to more involved repairs. Remember to always prioritize safety and use appropriate personal protective equipment (PPE) like gloves and eye protection.
Minor Surface Damage: Mildew and Staining
This scenario involves a section of cedar siding showing noticeable mildew and discoloration from prolonged exposure to moisture and algae. The damage is primarily cosmetic, but if left untreated, it can lead to more significant problems.
The necessary materials include a garden hose with a spray nozzle, a stiff-bristled brush, a solution of mild detergent and water (avoid harsh chemicals), and a bleach solution (one part bleach to three parts water – use with caution and proper ventilation).
The remediation process involves these steps:
- Thoroughly rinse the affected area with water to remove loose dirt and debris.
- Apply the detergent solution using a brush, scrubbing gently to loosen the mildew and stains.
- Rinse thoroughly again with clean water.
- If mildew persists, apply the bleach solution with a brush, ensuring even coverage. Allow it to sit for 10-15 minutes before rinsing thoroughly.
- Allow the siding to dry completely before applying a wood preservative or sealant to protect it from future damage.
Moderate Damage: Rotting and Splitting
This example features a section of cedar siding exhibiting signs of rot and splitting due to prolonged water exposure and lack of maintenance. Some boards show significant deterioration and may require replacement.
The materials needed include a pry bar, a hammer, replacement cedar boards (matching the existing siding in color and grain as closely as possible), wood screws, wood filler, sandpaper, and exterior wood paint or stain.
The repair procedure is as follows:
- Carefully remove the damaged cedar boards using a pry bar, taking care not to damage surrounding boards.
- Measure and cut the replacement boards to the correct size and length.
- Attach the new boards using wood screws, ensuring they are flush with the surrounding siding.
- Fill any gaps or holes with wood filler, allowing it to dry completely.
- Sand the filled areas smooth.
- Apply exterior wood paint or stain to match the existing siding, protecting the new and surrounding boards from the elements.
Severe Damage: Insect Infestation and Structural Compromise
In this scenario, a significant portion of the cedar siding shows signs of insect infestation (likely carpenter ants or termites), leading to significant structural damage and potential compromise of the building’s integrity. This requires a more extensive repair involving professional intervention.
Necessary materials and procedures will depend on the extent of the infestation and the structural damage. This often involves professional pest control treatment to eliminate the insects, followed by the repair or replacement of severely damaged sections of siding. A structural engineer may be necessary to assess the stability of the affected area. In this case, materials may include insecticide, replacement cedar boards, possibly structural supports, and potentially specialized tools and equipment. The repair process would involve professional assessment, treatment, and then repair following the steps outlined in the moderate damage scenario, but on a much larger scale and potentially requiring the expertise of multiple tradespeople.
Last Recap
Proper cedar siding maintenance isn’t just about fixing problems; it’s about proactive care that safeguards your home’s exterior and increases its longevity. By following the tips and techniques outlined in this guide, you can ensure your cedar siding remains a beautiful and functional part of your home for many years. Regular inspections, prompt attention to minor issues, and the strategic use of sealants and stains will pay dividends in terms of both aesthetics and your wallet. Remember, a little preventative care goes a long way!
FAQ Resource
How often should I seal my cedar siding?
The frequency depends on your climate and the type of sealant used, but every 3-5 years is a good rule of thumb. Check the manufacturer’s instructions for your specific product.
Can I power wash my cedar siding?
Use caution! High-pressure power washing can damage cedar. A lower-pressure setting and careful technique are essential. Consider a garden hose with a nozzle attachment instead.
What’s the best way to remove mildew from cedar siding?
A solution of oxygen bleach and water, applied with a scrub brush, is often effective. Always test a small, inconspicuous area first.
How do I know if I need to replace a cedar siding board?
Look for significant cracks, rot, or insect damage. If a board is severely compromised, replacement is necessary to prevent further issues.
What type of stain is best for cedar siding?
Oil-based stains offer superior protection, but water-based stains are easier to clean up. Consider the climate and your desired aesthetic when choosing.
Comments are closed.