Cedar Siding Installers Your Guide
Cedar siding installers are crucial for achieving the beautiful, durable exterior you envision. Finding the right installer involves more than just an online search; it requires understanding their qualifications, the installation process, and budgeting for the project. This guide will walk you through each step, from finding reputable installers to maintaining your stunning new cedar siding.
We’ll cover essential aspects like identifying qualified professionals, understanding different cedar siding types, and navigating the costs involved. We’ll also explore the intricacies of the installation process itself, providing insights into preparing the surface, selecting the right tools and materials, and ensuring a long-lasting, aesthetically pleasing result. Finally, we’ll delve into maintenance to help you keep your cedar siding looking its best for years to come.
Finding Cedar Siding Installers
Finding reliable cedar siding installers is crucial for a successful project. A poorly installed siding job can lead to costly repairs down the line, impacting both the aesthetics and longevity of your home. This section will guide you through the process of locating and selecting qualified professionals.
Resources for Locating Cedar Siding Installers
Several resources can help you find qualified cedar siding installers in your area. These resources vary in their scope and the level of verification they provide for the installers listed. It’s always advisable to conduct your due diligence before making a hiring decision.
- Online Directories: Websites like Angi (formerly Angie’s List), HomeAdvisor, and Yelp often feature listings for local contractors, including those specializing in cedar siding installation. These sites frequently include customer reviews and ratings, offering valuable insights into the quality of service provided.
- Professional Associations: Organizations such as the National Association of Home Builders (NAHB) and local chapters of similar associations may have member directories listing certified contractors. Membership in such associations often indicates a commitment to professional standards and ongoing training.
- Local Lumber Yards and Home Improvement Stores: These businesses often work with contractors and can provide referrals to reputable installers in your region. They may also have information on pricing and materials.
- Word-of-Mouth Referrals: Asking friends, family, neighbors, or colleagues for recommendations is a valuable approach. Personal referrals can offer insights into a contractor’s reliability, work ethic, and the overall quality of their work.
Selecting a Suitable Installer: A Flowchart
The process of selecting a suitable installer can be visualized as a flowchart. This helps to systematically evaluate potential candidates and ensure a well-informed decision.
[Imagine a flowchart here. The flowchart would begin with “Need Cedar Siding Installation?” Yes leads to “Search for Installers (Online, Referrals, etc.)”. This then branches to “Check Reviews and Qualifications”. Yes leads to “Get Multiple Estimates”. Yes leads to “Compare Estimates and Choose Installer”. No leads to “Refine Search Criteria”. No leads to “Project Postponed/Alternative Solution”.] The flowchart visualizes a systematic process of eliminating unqualified candidates, evaluating quotes, and making an informed decision.
Comparing Methods of Finding Installers
Different methods of finding installers offer varying advantages and disadvantages. The table below summarizes these key aspects to help you decide which approach best suits your needs.
| Method | Pros | Cons | Example |
|---|---|---|---|
| Online Search (e.g., Google, Yelp) | Convenient, wide reach, access to reviews | Potential for unqualified contractors, difficulty verifying credentials | Searching “cedar siding installers [your city]” on Google |
| Referrals (friends, family, neighbors) | Trustworthy recommendations, firsthand experience | Limited reach, may not find many options | Asking a neighbor for their siding installer’s contact information |
| Professional Associations | Access to vetted professionals, higher standards | May have limited listings in certain areas, potential for higher costs | Checking the NAHB website for certified contractors |
| Local Lumber Yards/Home Improvement Stores | Access to local contractors with established relationships | Limited options, potential bias towards specific contractors | Asking your local Home Depot for recommendations |
Evaluating Installer Qualifications
Choosing the right cedar siding installer is crucial for a beautiful and long-lasting result. Don’t rush the process; thoroughly investigate potential installers to ensure they meet your needs and expectations. Taking the time to assess qualifications will save you potential headaches and costly repairs down the line.
Key Qualifications and Certifications
Finding a qualified installer involves more than just checking online reviews. Look for certifications and qualifications that demonstrate their expertise in cedar siding installation. Reputable installers often hold certifications from organizations like the National Association of Home Builders (NAHB) or similar regional associations. These certifications often involve training and testing, ensuring a certain level of knowledge and skill. Furthermore, experience with specific cedar siding types (e.g., Western Red Cedar, Alaskan Yellow Cedar) is beneficial, as different types require varying installation techniques. A proven track record with similar projects will provide additional confidence in their abilities.
Insurance and Licensing
It’s paramount that your chosen installer carries both general liability insurance and workers’ compensation insurance. General liability insurance protects you in case of accidents or damage to your property during the installation process. Workers’ compensation insurance protects the installer’s employees in case of on-the-job injuries, preventing potential financial liability for you. Licensing requirements vary by location, but checking for proper licensing ensures the installer adheres to local regulations and safety standards. Request proof of insurance and licensing before signing any contracts. Failing to do so could leave you vulnerable to significant financial risk.
Installer Experience Levels
Experience significantly impacts the quality of the installation. While years of experience are a good indicator, consider the *type* of projects completed. An installer with 10 years of experience solely installing vinyl siding may not possess the same level of expertise as one with 5 years of experience specifically installing cedar siding on various types of homes. Request references and photos of past projects, particularly those similar in scale and style to your own. Look for consistency in quality and attention to detail. A portfolio showcasing a variety of projects, including complex designs, demonstrates a higher level of skill and adaptability. For example, an installer experienced in installing cedar siding on multi-story homes will likely have a better understanding of safety protocols and logistical challenges compared to someone with experience only on smaller projects.
Questions to Ask Potential Installers
Before committing to a cedar siding installer, prepare a checklist of questions to assess their suitability. This proactive approach will help you make an informed decision. The following points are crucial to discuss:
- Detailed explanation of their installation process, including material sourcing and waste disposal.
- Specific experience with the type of cedar siding you’ve chosen and similar projects.
- Copies of their insurance certificates and licensing information.
- References from previous clients and contact information for verification.
- Detailed breakdown of the project costs, including material and labor costs, and a clear payment schedule.
- Timeline for completion of the project, including potential delays and contingency plans.
- Warranty information and the duration of coverage for their work.
- Their approach to addressing unexpected issues or challenges during the installation process.
Understanding the Cedar Siding Installation Process
Source: buffalo-lumber.com
Cedar siding installation is a multi-step process requiring careful planning and execution to ensure a long-lasting, beautiful exterior. Understanding each step, from material selection to final finishing, is crucial for a successful project. This section details the typical process, considerations for different cedar siding types, surface preparation, and the necessary tools and materials.
Cedar Siding Types and Applications, Cedar siding installers
Different types of cedar siding offer varying aesthetics and performance characteristics. Choosing the right type depends on the project’s budget, desired look, and the climate. Common types include bevel siding, channel siding, and shingle siding. Bevel siding, with its classic look, is a versatile choice for many applications. Channel siding provides a more contemporary appearance and is often preferred for its clean lines. Shingle siding, with its rustic charm, is ideal for adding a unique texture and visual interest. The choice often comes down to personal preference and the overall style of the home. For example, a modern home might benefit from the sleek lines of channel siding, while a more traditional home might be better suited to the classic look of bevel siding. Climate also plays a role; in areas with heavy rainfall, a thicker siding might be preferred for added protection.
Surface Preparation for Cedar Siding Installation
Proper surface preparation is paramount for a successful cedar siding installation. This involves removing any existing siding, ensuring the underlying structure is sound, and preparing the surface for the new siding. This may involve repairing damaged sheathing, replacing rotten wood, and installing building paper or house wrap to create a moisture barrier. The surface should be clean, dry, and level before installation begins. Any unevenness should be addressed to ensure a flush and aesthetically pleasing finish. For instance, if there are significant gaps or inconsistencies in the underlying sheathing, these should be filled and leveled before proceeding. This step is crucial to prevent future problems and ensures the longevity of the siding installation.
Tools and Materials for Cedar Siding Installation
A successful cedar siding installation requires the right tools and materials. Essential tools include measuring tapes, levels, saws (circular saw, hand saw), drills, nail guns (optional but recommended for efficiency), and various hand tools for trimming and fitting. Materials include cedar siding boards (in the chosen type and quantity), appropriate nails or screws, building paper or house wrap, flashing (for windows and doors), caulk, and possibly stain or sealant depending on the desired finish. The quantity of materials will depend on the size of the project. For example, a larger home will require significantly more siding boards than a smaller shed. It’s crucial to accurately estimate the required materials to avoid mid-project delays.
The Cedar Siding Installation Process: A Step-by-Step Guide
The installation process typically begins with establishing a level starting point, usually at the bottom of the wall. Siding boards are then installed horizontally, overlapping each other, and secured with nails or screws. Each course of siding should be carefully aligned and leveled to ensure a uniform appearance. Special attention should be paid to corners, windows, and doors, where flashing and careful cutting are necessary to prevent water intrusion. Proper nailing is crucial to avoid splitting the wood. It is generally recommended to avoid driving nails directly into the knots of the wood. Once the siding is installed, it can be finished with a stain or sealant to protect the wood from the elements and enhance its natural beauty. The specific details may vary slightly depending on the type of siding used. For example, shingle siding installation involves slightly different techniques compared to bevel or channel siding.
Cost and Budgeting for Cedar Siding Installation
Source: capital-lumber.com
Cedar siding installation costs can vary significantly depending on several factors. Understanding these factors and creating a realistic budget is crucial for a smooth and financially responsible project. This section will help you navigate the cost landscape and prepare a comprehensive budget for your cedar siding installation.
Factors Influencing Cedar Siding Installation Costs
Several key factors contribute to the final cost of your cedar siding project. These include the size of the project (square footage of siding to be installed), the type of cedar used (e.g., Western Red Cedar, Eastern White Cedar, different grades), the complexity of the installation (e.g., intricate designs, multiple angles, difficult access), the need for additional services (e.g., removal of existing siding, repairs to underlying structure, window and door trim installation), labor costs (which vary by region and installer experience), and the cost of materials (cedar siding, fasteners, underlayment, etc.). Permitting fees and any necessary inspections will also add to the overall cost.
Cost Breakdowns for Different Project Sizes and Complexities
Let’s illustrate with some examples. A small project, such as siding a single-story shed (approximately 200 square feet), might cost between $3,000 and $6,000, including materials and labor. This lower range assumes readily accessible installation and use of standard cedar. A medium-sized project, like siding a single-story house (approximately 1,000 square feet), could range from $15,000 to $30,000, again varying based on the complexity of the design and materials used. Larger, more complex projects, such as a two-story home with intricate detailing (2,000+ square feet), might cost upwards of $30,000, potentially exceeding $60,000. These figures are estimates and can fluctuate widely based on the aforementioned factors.
Sample Budget Template for Cedar Siding Installation Projects
A well-structured budget is essential. Here’s a sample template:
| Item | Estimated Cost |
|---|---|
| Materials (Cedar Siding, Fasteners, Underlayment, etc.) | $ |
| Labor Costs (Installation, Prep Work) | $ |
| Permits and Inspections | $ |
| Contingency (10-15% of total estimated cost) | $ |
| Total Estimated Cost | $ |
Remember to fill in the estimated costs based on quotes from multiple installers and your material selections. The contingency helps cover unexpected expenses.
Negotiating Prices and Obtaining Competitive Bids
Obtaining multiple bids from reputable installers is crucial for securing competitive pricing. Articulate the scope of work in your request for quotes, including specifications on the type of cedar, installation details, and any additional services needed. Compare bids carefully, considering not only the total price but also the installers’ experience, reputation, and insurance coverage. Don’t hesitate to negotiate – politely discuss the pricing with installers, highlighting any areas where you might be able to adjust the scope of work to reduce costs while maintaining the quality of the final product. Remember to get everything in writing before work begins.
Maintaining Cedar Siding: Cedar Siding Installers
Source: eavestroughandsiding.com
Cedar siding, with its natural beauty and durability, requires proper care to maintain its aesthetic appeal and longevity. Neglecting maintenance can lead to premature deterioration and costly repairs. Regular cleaning, treatment, and inspections are key to preserving your investment.
Proper Maintenance Procedures
To extend the lifespan of your cedar siding, a proactive maintenance approach is crucial. This involves regular cleaning to remove dirt, debris, and mildew, followed by protective treatments to shield the wood from the elements. Consistent care will prevent significant damage and maintain the siding’s rich color and texture. Remember, prevention is always cheaper than cure when it comes to home maintenance.
Common Problems and Solutions
Several issues can affect cedar siding over time. Mildew, a common problem in humid climates, appears as a dark, fuzzy growth. This can be treated with a solution of bleach and water (always test in an inconspicuous area first). Another concern is wood rot, caused by prolonged exposure to moisture. This requires more intensive repairs, potentially involving replacing affected sections of siding. Insect infestation, particularly from carpenter ants or termites, is a serious issue that necessitates professional pest control. Finally, sun damage can lead to fading and cracking. Regular application of a high-quality wood sealant can help mitigate this.
Routine Maintenance Schedule
Regular maintenance is essential for preventing costly repairs down the line. A yearly cleaning and treatment schedule is recommended for most climates.
- Spring Cleaning: This involves a thorough cleaning using a pressure washer (low pressure setting) to remove dirt, debris, and loose surface mildew. Follow up with a mildewcide treatment if necessary.
- Annual Treatment: Apply a high-quality water-repellent wood sealant to protect the cedar from moisture damage and UV rays. Choose a sealant that allows the wood to breathe to prevent trapping moisture.
- Fall Inspection: Conduct a visual inspection for signs of damage, such as cracks, rot, or insect infestation. Address any issues promptly to prevent further deterioration.
Regular Inspections
Regular inspections are vital for early detection of potential problems. At least twice a year, conduct a thorough visual inspection of your cedar siding. Look for signs of rot (soft, spongy wood), insect damage (small holes, sawdust), and mildew (dark discoloration). Early detection allows for timely intervention, preventing minor issues from escalating into major, costly repairs. For example, a small area of rot discovered early might only require localized repair, whereas significant rot could necessitate replacing large sections of siding. Similarly, addressing insect infestations early can prevent widespread damage. A proactive approach saves both money and time in the long run.
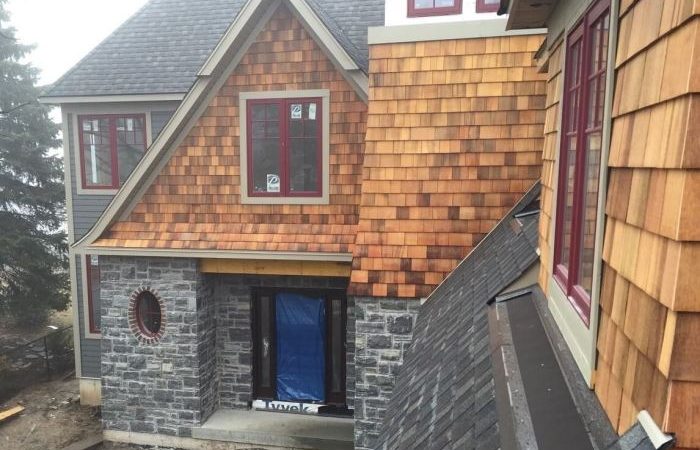
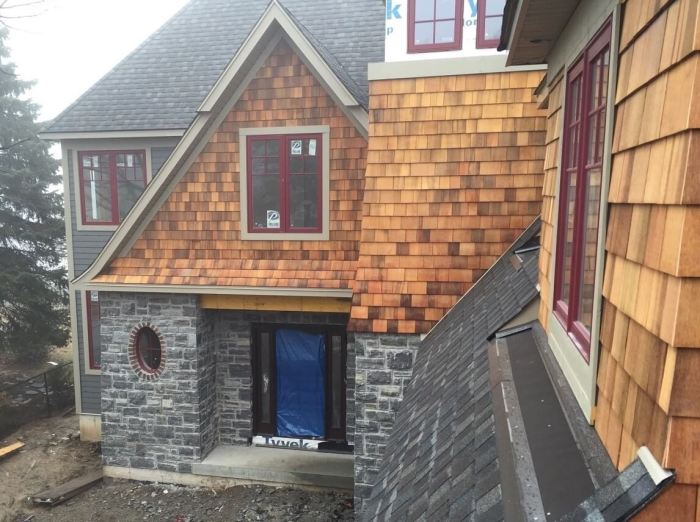
Visual Examples of Cedar Siding Installations
Choosing the right cedar siding and installation style can dramatically impact your home’s curb appeal and overall value. Understanding the visual possibilities is key to making informed decisions. This section will explore various styles, highlighting the aesthetic impact on different home types and showcasing successful design elements.
Vertical Cedar Siding on a Cape Cod
Imagine a classic Cape Cod cottage, its white trim gleaming against the backdrop of a rich, deep-red vertical cedar siding. The vertical lines elongate the structure, creating a sense of height and elegance. The natural texture of the cedar adds warmth and character, contrasting beautifully with the crisp white details. The overall effect is charming and timeless, enhancing the home’s inherent quaintness. The relatively narrow boards used in this vertical installation give a more refined and detailed appearance.
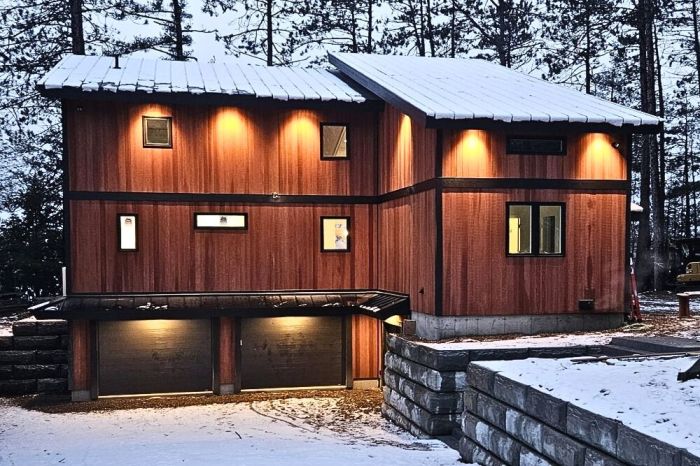
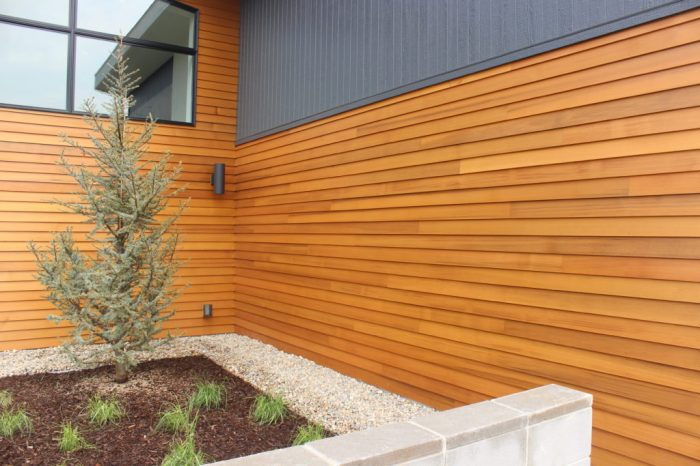
Horizontal Cedar Siding on a Ranch Style Home
A horizontal cedar siding installation on a ranch-style home offers a clean, contemporary feel. Picture a sprawling ranch house clad in smooth, light-colored cedar siding. The horizontal lines accentuate the home’s low profile, creating a sense of grounded stability. This style allows for larger siding boards, which can create a more modern, minimalist aesthetic. The natural variations in the wood’s color add subtle visual interest without overwhelming the overall simplicity of the design. A subtle variation could include using slightly darker cedar accents around windows and doors to define these architectural features.
Shiplap Cedar Siding on a Farmhouse
Shiplap cedar siding, with its distinctive overlapping boards, provides a rustic charm particularly well-suited to farmhouse styles. Envision a farmhouse with wide, weathered grey shiplap cedar siding. The pronounced horizontal lines and slightly uneven edges contribute to a cozy, lived-in feel. The texture and color variations in the aged cedar create a visually interesting surface, enhancing the farmhouse’s rustic character. The use of darker grout between the boards further emphasizes the texture and enhances the overall rustic aesthetic.
Cedar Shake Siding on a Mountain Cabin
For a mountain cabin or rustic retreat, cedar shake siding offers a rugged and natural aesthetic. Picture a cozy cabin nestled amongst trees, its exterior clad in thick, textured cedar shakes. The varied lengths and slightly irregular shapes of the shakes create a visually appealing, almost handcrafted look. The darker, more weathered appearance of the shakes blends seamlessly with the natural surroundings, providing a feeling of harmony with the environment. This style often utilizes darker stains to further enhance the rustic character and weather resistance.
Mixed Cedar Siding Styles
Combining different cedar siding styles can create a unique and visually compelling exterior. For example, a home might use vertical siding on the upper stories and horizontal siding on the lower levels, creating a dynamic and interesting façade. Alternatively, different siding widths or patterns can be used to highlight architectural details, such as dormers or bay windows. This approach requires careful planning and execution to ensure a cohesive and balanced design. A skilled installer can use this technique to add depth and visual interest to a home’s exterior.
Ending Remarks
Choosing the right cedar siding installers is a significant decision impacting both the aesthetics and longevity of your home’s exterior. By carefully considering the factors Artikeld in this guide—from qualifications and cost to maintenance—you can confidently select a team that delivers exceptional results. Remember, a well-installed cedar siding not only enhances your home’s curb appeal but also provides lasting protection. So, take your time, ask questions, and enjoy the beautiful outcome!
FAQ Summary
What types of insurance should my cedar siding installer carry?
Look for general liability and workers’ compensation insurance. This protects you from potential financial losses due to accidents or damages during the installation.
How long should a cedar siding installation take?
The timeframe varies greatly depending on the project size and complexity. Get a detailed timeline from your installer before starting the work.
Can I install cedar siding myself?
While possible for smaller projects, professional installation is generally recommended. Improper installation can lead to costly repairs and damage.
What is the average lifespan of cedar siding?
With proper maintenance, cedar siding can last 20-30 years or even longer. Regular cleaning and treatment are key.
How do I clean cedar siding?
Use a soft-bristled brush and a gentle cleaning solution. Avoid harsh chemicals that could damage the wood.
Comments are closed.