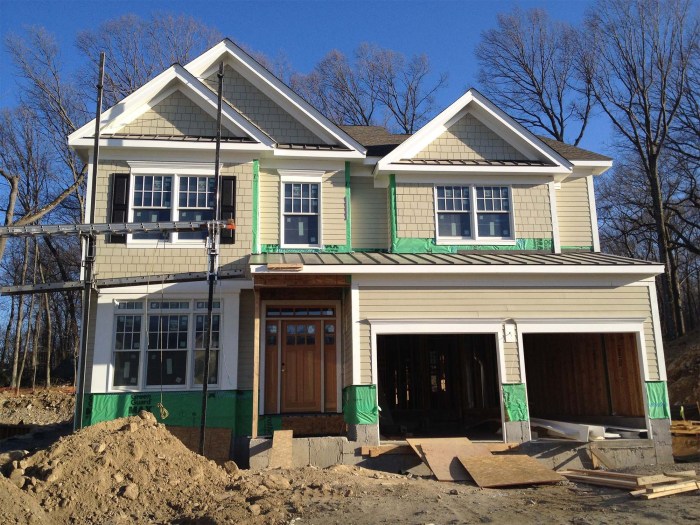
Hardie Board Installation A Complete Guide
Hardie board installation might sound intimidating, but with the right knowledge and approach, it’s a manageable DIY project. This guide breaks down the process step-by-step, from initial planning and material selection to the final touches, ensuring a professional-looking and long-lasting result. We’ll cover everything from choosing the right type of Hardie board for your project to mastering essential cutting and finishing techniques. Get ready to transform your home’s exterior!
We’ll explore the advantages of Hardie board—its durability, resistance to weather damage, and low maintenance requirements—and provide practical tips for overcoming common installation challenges. Whether you’re a seasoned DIYer or a complete beginner, this guide will equip you with the confidence and know-how to successfully install Hardie board siding.
Introduction to Hardie Board
Hardie board, also known as fiber cement siding, is a popular exterior cladding material known for its durability and longevity. It’s a composite material made from a blend of cement, cellulose fibers, and other additives, creating a strong and weather-resistant product. This composition gives it significant advantages over traditional wood siding and other alternatives.
Hardie board offers several key benefits for homeowners. Its superior resistance to fire, rot, and insect infestation makes it a low-maintenance option. It’s also highly durable, capable of withstanding harsh weather conditions including strong winds, heavy rain, and even hail. Furthermore, Hardie board is available in a variety of styles and colors, allowing for considerable aesthetic flexibility in home design. The material’s strength contributes to a longer lifespan, reducing the frequency of costly repairs and replacements compared to other siding materials.
Hardie Board Composition and Properties
Hardie board’s strength and resilience stem from its unique composition. The cement provides the structural integrity, while the cellulose fibers add tensile strength and flexibility. The blend is then typically treated with additives to enhance properties such as water resistance and UV stability. This results in a product that is remarkably resistant to damage from moisture, insects, and fire, making it a highly durable and long-lasting exterior cladding option. The specific properties can vary slightly depending on the product line and intended application.
Types of Hardie Board and Their Applications
James Hardie, the primary manufacturer, offers a range of Hardie board products, each designed for specific applications. These include lap siding, designed to mimic the look of traditional wood lap siding; vertical siding, offering a clean, modern aesthetic; panels, suitable for larger areas or unique design features; and shingles, providing a textured, rustic look. The choice depends largely on the architectural style of the home and the desired aesthetic. For instance, lap siding is a popular choice for homes with a more traditional design, while vertical siding might be preferred for contemporary homes. Panel systems are often used for large expanses of wall, providing a streamlined look, and shingles are ideal for creating a more textured and varied appearance.
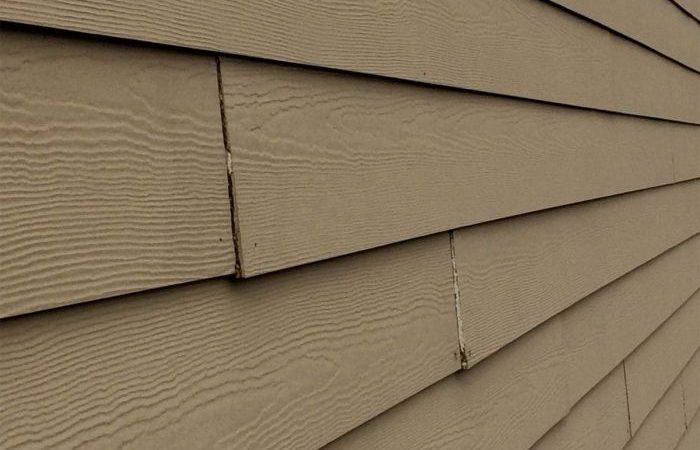
Pre-Installation Preparations
Source: gambrick.com
Getting ready is key to a smooth Hardie board installation. Proper preparation saves time, prevents mistakes, and ensures a long-lasting, beautiful finish. This section covers the essential tools, materials, and surface preparation steps you’ll need before you even think about cutting your first panel.
Before you begin, it’s crucial to have everything organized and ready to go. This minimizes interruptions and keeps the project moving efficiently.
Tools and Materials
Having the right tools and materials on hand is paramount for a successful Hardie board installation. A well-stocked toolbox will make the process much easier and more efficient.
- Measuring Tape: A reliable tape measure, at least 25 feet long, is essential for accurate measurements.
- Pencil: For marking cutting lines and other important measurements on the Hardie board.
- Circular Saw with a fine-tooth blade specifically designed for cutting fiber cement: This is crucial for clean, accurate cuts. A carbide-tipped blade is highly recommended.
- Safety Glasses: Protecting your eyes from flying debris is non-negotiable.
- Hearing Protection: A good pair of earplugs or earmuffs will protect your hearing from the noise of the saw.
- Work Gloves: Protect your hands from splinters and rough edges.
- Ladder: If working at heights, a sturdy ladder is a must. Always follow safety guidelines for ladder use.
- Level: A level ensures that your Hardie board is installed straight and true.
- Caulk Gun: For applying sealant around windows, doors, and other openings.
- Utility Knife: Useful for trimming and smaller cuts.
- Hammer: For driving nails or staples (depending on your fastening method).
- Nail Gun (optional but recommended for larger projects): Significantly speeds up the installation process.
- Hardie Board Nails or Staples: Choose the correct fasteners for your specific Hardie board type and application.
- Primer: Specifically designed for Hardie board to ensure proper paint adhesion.
- Exterior Paint: Choose a high-quality exterior paint suitable for fiber cement siding.
- Sealant: A high-quality exterior-grade sealant to protect against moisture.
- Wood shims: For leveling uneven surfaces.
- Safety Harness (if working at significant heights): Prioritize safety when working above ground level.
Surface Preparation
Proper surface preparation is crucial for a successful and long-lasting Hardie board installation. A clean, even surface ensures proper adhesion and prevents future problems.
- Clean the surface thoroughly: Remove any loose debris, dirt, dust, old paint, or other contaminants. Pressure washing is often the most effective method for achieving a clean surface.
- Repair any damaged areas: Fill any holes, cracks, or gaps in the existing wall sheathing with appropriate patching compound. Allow ample drying time before proceeding.
- Check for moisture: Ensure the surface is completely dry before installing Hardie board. Excessive moisture can lead to problems with adhesion and mold growth.
- Level the surface: Use wood shims to level any uneven areas of the wall sheathing. A level surface ensures that the Hardie board will be installed properly.
Measuring and Cutting Hardie Board
Accurate measuring and cutting are essential to minimize waste and ensure a professional-looking finish. Careful planning and execution will yield the best results.
Example Plan: Let’s say you’re siding a 10ft x 12ft wall. Hardie board panels typically come in 4ft x 8ft sizes. You would need to calculate how many panels are needed to cover the area, accounting for overlaps and waste. For this example, you might need 4 panels (2 across and 2 down), allowing for vertical and horizontal overlaps of at least 1/2 inch for proper installation.
- Measure the wall carefully: Record accurate measurements of the wall’s height and width, accounting for any windows or doors.
- Plan panel layout: Sketch a diagram showing how the Hardie board panels will be arranged on the wall, considering the direction of the lap and minimizing waste.
- Cut the panels: Use a circular saw with a fine-tooth blade to cut the panels to the required sizes. Always wear safety glasses and hearing protection.
- Dry fit the panels: Before applying any adhesive or fasteners, dry-fit the panels to ensure a proper fit and make any necessary adjustments.
Installation Techniques

Source: lowes.com
Installing Hardie board siding is a straightforward process, but proper technique is crucial for a long-lasting, weatherproof finish. This section details the steps involved, compares different installation methods, and emphasizes the importance of proper sealing and flashing.
Remember to always consult the manufacturer’s instructions for your specific Hardie board product, as installation methods may vary slightly.
Step-by-Step Hardie Board Siding Installation
This process is a typical horizontal installation. Vertical installation follows a similar principle, but panel orientation changes.
- Prepare the sheathing: Ensure your underlying sheathing is properly installed, level, and free of any debris or imperfections. A smooth, even surface is key for a professional-looking finish. Imagine a perfectly flat canvas, ready for your masterpiece.
- Start with the first course: Begin at a corner, typically the lowest point of your wall. Use a level to ensure the first panel is perfectly aligned. This sets the tone for the entire project. A misaligned first panel will result in noticeable errors down the line.
- Fastening: Secure the panel to the framing using appropriate nails or screws. Space fasteners according to manufacturer’s recommendations, typically every 6-8 inches. Over-fastening can damage the board. Under-fastening leads to loose panels. Aim for consistent spacing.
- Overlapping panels: Overlap the panels according to manufacturer specifications, typically 1/4 inch to 1/2 inch, to create a weather-resistant barrier. Think of it as a tightly sealed envelope, preventing any water intrusion. The overlap provides strength and protects against wind-driven rain.
- Cutting panels: Use a circular saw with a fine-toothed blade to cut the panels to size. Wear appropriate safety gear. Precise cutting ensures a clean, professional appearance. Improper cuts can lead to gaps and leaks.
- Finishing: Once all panels are installed, caulk any gaps or seams to ensure a watertight seal. This final step is crucial in preventing water damage. Think of it as the finishing touch on a perfect painting. It’s a small step that makes a big difference.
Illustrative Example (Imagine this): Imagine a picture showing a worker carefully nailing a Hardie board panel to a wall, maintaining even spacing between fasteners. Another image could show the proper overlap between two adjacent panels, creating a clean, seamless look. A third image could depict the use of caulk to seal gaps around windows or corners.
Comparison of Horizontal and Vertical Installation Methods
Both horizontal and vertical installation methods are viable for Hardie board, but each has its advantages and disadvantages.
| Method | Advantages | Disadvantages | Suitability |
|---|---|---|---|
| Horizontal | Easier installation, less visible fastener heads, good for shedding water | Can be more challenging to manage around corners, may require more cutting | Best for most applications, especially large, open walls. |
| Vertical | Minimizes visible horizontal lines, better for hiding imperfections in sheathing, easy around corners | More challenging installation, more visible fastener heads, may require more precise cutting. | Ideal for smaller walls or areas where a more modern look is desired. |
Flashing and Sealing Techniques
Proper flashing and sealing are paramount to preventing water damage. These techniques create a barrier against moisture penetration, protecting your home’s structure and the siding itself.
Flashing should be installed around all windows, doors, and other penetrations in the wall. It acts as a secondary barrier, diverting water away from vulnerable areas. Think of it as a rain gutter for your wall.
Sealing should be done with high-quality caulk, applied carefully to all joints and seams. This creates a watertight seal, preventing moisture from entering the wall cavity. It’s the glue that holds your protective barrier together.
Example: Imagine a picture showing properly installed flashing around a window, diverting water away from the siding. Another image could show the meticulous application of caulk around a seam between two Hardie board panels.
Cutting and Finishing Hardie Board

Source: statelineext.com
Getting neat, clean cuts and properly finished edges is crucial for a professional-looking and long-lasting Hardie Board installation. Improper cutting can lead to splintering, which compromises the board’s integrity and aesthetic appeal. Careful finishing prevents water damage and ensures a seamless integration with other building materials.
Proper cutting and finishing techniques depend largely on the tool you’re using and the type of cut needed. Always wear appropriate safety gear, including eye protection and a dust mask, when working with Hardie Board.
Cutting Hardie Board with a Circular Saw
A circular saw offers the fastest and most efficient method for cutting Hardie Board, especially for straight cuts. Use a fine-toothed carbide-tipped blade specifically designed for cutting fiber cement. This type of blade minimizes chipping and ensures a cleaner cut. Clamp the Hardie Board securely to a stable work surface to prevent movement during cutting. Make a slow, steady cut, allowing the blade to do the work. Avoid forcing the saw, as this can lead to binding and damage. After cutting, inspect the edges for any loose fibers and carefully remove them with sandpaper.
Cutting Hardie Board with a Hand Saw
For intricate cuts or when working in tight spaces, a hand saw provides more control. Again, a fine-toothed blade is essential. Score the board lightly along your cut line before sawing to prevent splintering. Use a slow, even sawing motion, applying consistent pressure. This will result in a cleaner, more accurate cut. As with a circular saw, smooth any rough edges with sandpaper after cutting.
Finishing Hardie Board Edges and Corners
After cutting, the edges of Hardie Board will likely need some finishing. This involves smoothing any rough edges and creating a consistent profile to ensure a watertight seal. Use a medium-grit sandpaper to smooth any rough edges and remove any loose fibers. For a more professional look, consider using a hand plane or a specialized edge-finishing tool to create a consistent bevel on the edges. This also helps prevent chipping and cracking. Corner joints should be carefully aligned and secured to prevent water penetration.
Applying Caulk and Sealant
Caulk and sealant are essential for creating a watertight seal around Hardie Board panels, particularly at joints and edges. Choose a high-quality, exterior-grade caulk that’s compatible with fiber cement. Before applying the caulk, ensure the surfaces are clean, dry, and free of dust or debris. Apply a generous bead of caulk to the joint, using a caulking gun. Smooth the caulk with a wet finger or a caulking tool to create a smooth, even finish. Allow the caulk to fully cure before painting or applying any other finishes. This prevents cracking and ensures a durable, long-lasting seal. Properly applied caulk prevents water from penetrating the joints and causing damage to the underlying structure.
Dealing with Specific Installation Challenges
Installing Hardie board can present some unique challenges, especially for DIYers. Understanding these potential problems beforehand can save you time, frustration, and potentially costly mistakes. This section covers common issues and provides practical solutions to help you achieve a professional-looking and long-lasting finish.
Uneven surfaces and tricky corners are two of the most frequently encountered problems. Other challenges might include working with existing siding, cutting around windows and doors precisely, and managing expansion and contraction of the material in different weather conditions. Proper planning and technique are crucial to overcome these obstacles.
Uneven Wall Surfaces
Dealing with uneven walls requires careful planning and the use of appropriate techniques. Significant irregularities need to be addressed before Hardie board installation begins. Smaller imperfections can often be accommodated using shims and furring strips to create a consistent, level surface for the panels. Larger dips or bumps might necessitate more extensive repairs, such as patching or replacing sections of the wall. Remember, a perfectly flat surface is crucial for achieving a professional finish and preventing future problems. Failing to address unevenness can lead to gaps, uneven seams, and an overall unprofessional appearance.
Difficult Corners and Angles
Corners present a challenge because they require precise cutting and fitting of the Hardie board to ensure a tight, weatherproof seal. Using a miter saw with a fine-tooth blade will help achieve clean, accurate cuts. For inside corners, it’s essential to use corner trim designed specifically for Hardie board, ensuring a smooth, finished look. Outside corners can be handled similarly, utilizing appropriate trim pieces for a professional finish. Careful measurement and precise cutting are key to achieving seamless corners.
Troubleshooting Tips for Common Installation Issues
Here are some quick fixes for common problems you might encounter:
- Gaps between panels: Check for uneven surfaces and use shims to create a consistent plane. Ensure proper overlap and nail spacing.
- Cracked or broken panels: Handle Hardie board carefully to avoid damage during transport and installation. Use appropriate cutting techniques to minimize breakage.
- Uneven seams: Ensure proper alignment before nailing. Use a level to check for evenness throughout the installation process.
- Nail pops: Use galvanized nails of the correct length and spacing. Drive nails straight and flush with the surface.
- Water damage: Ensure proper flashing and caulking around windows and doors. Allow for sufficient expansion and contraction gaps.
- Difficult cuts: Use a sharp blade, whether it’s a circular saw or a hand saw, specifically designed for cutting fiber cement. A scoring tool can also help prevent chipping.
Post-Installation Care and Maintenance

Source: homedit.com
Hardie board siding, while incredibly durable, still requires regular care and maintenance to ensure its longevity and maintain its attractive appearance. Neglecting this can lead to premature deterioration and costly repairs down the line. A proactive approach to maintenance will significantly extend the lifespan of your Hardie board investment.
Regular inspection and prompt attention to minor issues will prevent small problems from escalating into larger, more expensive ones. Think of it like regular car maintenance – small issues addressed early are much cheaper and easier to fix than major breakdowns later.
Cleaning Hardie Board Siding
Cleaning your Hardie board siding is a simple but crucial part of maintaining its appearance and protecting it from the elements. Regular cleaning removes dirt, grime, mildew, and other contaminants that can degrade the surface and affect its color. For routine cleaning, a simple solution of mild detergent and water, applied with a soft-bristled brush or sponge, is usually sufficient. Rinse thoroughly with clean water afterwards. For more stubborn stains or mildew, a solution of bleach and water (following the manufacturer’s recommendations for dilution) can be effective. Always test any cleaning solution in an inconspicuous area first to ensure it doesn’t damage the finish. Power washing can be used, but should be done with caution, using a low-pressure setting to avoid damaging the surface. Direct the spray at a slight angle to prevent water from seeping behind the siding.
Preserving Hardie Board Appearance
While Hardie board is naturally resistant to rot and insects, protecting its color and finish is important. Regular cleaning, as described above, is the first line of defense. In some climates, especially those with harsh sun exposure, applying a high-quality exterior paint or stain specifically designed for fiber cement siding can further enhance its protection and extend its lifespan. Always follow the manufacturer’s instructions for application and allow sufficient drying time between coats. Repainting or restaining should be done every few years, depending on the climate and the type of coating used. For example, in areas with intense UV exposure, more frequent recoating might be necessary.
Repairing Minor Damage to Hardie Board
Minor damage, such as small dents or scratches, can often be repaired easily. For small dents, you might be able to carefully tap them out from the back using a soft mallet and a block of wood to avoid further damage. For scratches, a touch-up paint in the matching color can effectively conceal them. More significant damage, such as cracks or large holes, may require replacing the affected section of siding. This usually involves removing the damaged piece, carefully measuring the replacement piece, cutting the new piece to size, and securing it in place using appropriate fasteners. Always refer to the manufacturer’s instructions for specific repair procedures. Remember to use caulk to seal any gaps or seams to prevent water intrusion.
Safety Precautions During Installation
Hardie board installation, while rewarding, presents several potential hazards. Prioritizing safety is crucial to prevent injuries and ensure a successful project. This section includes essential safety measures to protect yourself and others throughout the installation process. Remember, safety isn’t just about following rules; it’s about developing a safety-conscious mindset.
Safe Hardie board installation requires careful planning and adherence to established safety protocols. This includes using appropriate personal protective equipment (PPE), understanding potential hazards, and diligently following manufacturer’s instructions and building codes. Neglecting these precautions can lead to serious injury or even death.
Personal Protective Equipment (PPE)
Appropriate PPE is non-negotiable. The potential for eye injuries, respiratory issues, and cuts necessitates the use of specific protective gear. Failing to wear this equipment can have serious consequences.
- Safety Glasses or Goggles: Protect your eyes from flying debris generated during cutting and handling.
- Dust Mask or Respirator: Hardie board dust is a respiratory irritant. A properly fitted N95 respirator is recommended, especially when working in enclosed spaces.
- Gloves: Protect your hands from cuts and splinters. Consider cut-resistant gloves for added protection.
- Hearing Protection: Power tools can generate significant noise levels. Earmuffs or earplugs are essential to prevent hearing damage.
- Long-Sleeved Shirt and Long Pants: Protect your skin from abrasions and dust.
- Safety Boots: Protect your feet from falling objects and sharp materials.
Adherence to Manufacturer’s Instructions and Building Codes, Hardie board installation
Manufacturers provide detailed instructions for the safe installation of their products. These instructions are not suggestions; they are crucial for ensuring the product’s performance and your safety. Similarly, local building codes, safety regulations, and best practices for construction. Ignoring either can lead to structural problems, injury, or legal repercussions.
Always follow the manufacturer’s instructions precisely. Deviations can compromise the structural integrity of the finished product and create safety hazards.
Hazards Associated with Working at Heights and Power Tools
Working at heights and using power tools significantly increases the risk of accidents. Understanding and mitigating these risks is paramount.
- Working at Heights: Always use appropriate fall protection equipment, such as harnesses and safety lines, when working above ground level. Ensure scaffolding is stable and properly erected. Never overreach or work in unstable conditions.
- Power Tool Safety: Always use power tools according to the manufacturer’s instructions. Ensure the tools are in good working order and properly maintained. Never operate power tools while fatigued or under the influence of drugs or alcohol. Use appropriate safety guards and keep hands clear of cutting blades. Disconnect power tools before making adjustments or changing blades.
Epilogue: Hardie Board Installation
Installing Hardie board siding is an investment in your home’s beauty and longevity. By following the steps outlined in this guide and paying attention to detail, you can achieve a stunning, weather-resistant exterior that will enhance your curb appeal for years to come. Remember to prioritize safety throughout the process, and don’t hesitate to seek professional help if you encounter any significant challenges. With careful planning and execution, your Hardie board installation will be a project you can be proud of!
FAQs
Can I install Hardie board over existing siding?
Sometimes, but it depends on the condition of the existing siding. It often requires extra preparation and may not always be cost-effective.
What’s the best way to clean Hardie board after installation?
A simple wash with water and a mild detergent is usually sufficient. Avoid harsh chemicals or pressure washers.
How long does Hardie board siding typically last?
With proper installation and maintenance, Hardie board can last for 30-50 years or more.
Do I need special tools to cut Hardie board?
A circular saw with a carbide-tipped blade is recommended for clean cuts. Safety glasses and a dust mask are essential.
What type of nails should I use for Hardie board?
Use galvanized or stainless steel nails specifically designed for Hardie board. The manufacturer’s instructions will specify the correct nail type and size.
Comments are closed.