Painting Siding A Complete Guide
Painting siding transforms your home’s exterior, boosting curb appeal and protecting it from the elements. This guide walks you through every step, from choosing the right paint and prepping your siding to applying the paint like a pro and maintaining your fresh finish for years to come. We’ll cover different siding types, best practices, and even help you budget your project. Get ready to give your house a stunning new look!
Whether you’re tackling vinyl, wood, fiber cement, or aluminum siding, we’ll provide the information you need to succeed. We’ll delve into surface preparation techniques, paint selection, application methods, and essential tools, ensuring a professional-looking result that enhances your home’s value and beauty. This isn’t just about slapping on some paint; it’s about understanding the nuances of each siding material and applying the right techniques for a long-lasting, beautiful finish.
Types of Siding Suitable for Painting
Painting your siding can significantly improve your home’s curb appeal and protect it from the elements. However, not all siding types are created equal when it comes to painting. The material’s composition and texture directly impact the preparation and painting process. Choosing the right approach for your siding is crucial for a long-lasting, attractive finish.
Vinyl Siding and Painting Suitability
Vinyl siding is a popular choice for its affordability and low maintenance. While it’s not traditionally designed for painting, it *can* be painted successfully with the right preparation. Vinyl’s smooth, non-porous surface requires a thorough cleaning to remove dirt, mildew, and chalkiness before painting. A primer specifically designed for vinyl is essential to ensure proper adhesion and prevent peeling. The paint itself should be a high-quality acrylic-latex paint formulated for exterior use and flexible enough to accommodate the expansion and contraction of the vinyl in varying temperatures. Failure to properly prepare the surface can lead to paint chipping or peeling relatively quickly.
Wood Siding Preparation for Painting
Painting wood siding requires more extensive preparation than vinyl. Wood is a porous material, and its condition significantly impacts paint adhesion. Begin by inspecting the siding for any damage, such as cracks, rot, or loose boards. Repair any damage before proceeding. Next, thoroughly clean the siding to remove dirt, mildew, and loose paint. Power washing is often effective but should be done carefully to avoid damaging the wood. After cleaning, allow the wood to dry completely. For older wood siding, a coat of wood primer will help seal the surface and improve paint adhesion. The primer will also help to even out the absorption of paint across the surface, resulting in a more uniform final coat.
Fiber Cement Siding Paintability
Fiber cement siding offers durability and fire resistance. Its paintability is generally excellent compared to vinyl or aluminum. Its slightly textured surface provides good paint adhesion, and it’s less prone to cracking or peeling than other materials. However, proper preparation is still crucial. Cleaning the siding to remove dirt and debris is essential. Depending on the existing finish, a light sanding might be necessary to ensure a smooth surface for optimal paint adhesion. A primer isn’t always strictly required, but it can be beneficial, especially if covering a dark color with a lighter one or if the siding is new.
Preparing Aluminum Siding for Painting
Aluminum siding is known for its longevity and resistance to damage, but it presents unique challenges for painting. Its smooth, non-porous surface, much like vinyl, requires meticulous cleaning to remove dirt, grease, and any existing paint. Power washing is generally suitable but use a low-pressure setting to avoid damaging the siding. Aluminum siding often has a factory-applied finish that can affect paint adhesion. To ensure proper bonding, the surface should be thoroughly cleaned and lightly sanded to create a slightly roughened texture that allows the paint to grip better. A high-quality acrylic-latex paint formulated for metal surfaces is recommended, as it offers better flexibility and resistance to fading and chipping compared to other types of paint. A specialized primer designed for aluminum is also advisable to ensure optimal adhesion and longevity of the painted finish.
Paint Selection and Application Techniques
Painting your siding is a big job, but choosing the right paint and applying it correctly can make all the difference in the final look and longevity of your project. This section will guide you through selecting appropriate exterior paints and mastering the application techniques for a professional finish.
Choosing the right exterior paint is crucial for protecting your siding and enhancing its appearance. The type of paint you select should depend on several factors, including the type of siding material, the climate you live in, and your desired finish.
Exterior Paint Types for Siding, Painting siding
Exterior paints are formulated to withstand harsh weather conditions, UV exposure, and moisture. Acrylic latex paints are a popular choice for siding due to their flexibility, durability, and ease of application. They offer good mildew resistance and are available in a wide range of colors. Oil-based paints, while offering superior durability and water resistance, are becoming less common due to their strong odor, longer drying times, and environmental concerns. For specific siding types like wood, a specialized paint formulated for wood siding is recommended to provide optimal protection against moisture damage. For metal siding, a paint with excellent adhesion and rust-inhibiting properties is necessary.
Primer Selection and Application
Priming your siding before painting is a critical step that often gets overlooked. Primer acts as a bonding agent, improving paint adhesion and preventing peeling or chipping. It also helps to seal the surface, blocking stains and preventing them from bleeding through the topcoat. Choose a primer specifically designed for exterior use and compatible with your siding material and topcoat paint. Apply the primer evenly using the same techniques you’ll use for the paint. Allow the primer to dry completely before applying the paint. A well-primed surface will result in a more uniform and durable paint job.
Paint Application Techniques for Even Coverage
Achieving an even, professional paint finish requires careful preparation and technique. Start by thoroughly cleaning your siding to remove dirt, mildew, and loose paint. Repair any damaged areas before painting. Use painter’s tape to mask off areas you don’t want to paint, such as windows and trim. For best results, apply paint in thin, even coats, allowing each coat to dry completely before applying the next. Avoid overloading your brush or roller, as this can lead to drips and runs.
Paint Application Tools
The best paint application tool depends on the type of siding and your personal preference. For intricate details and trim work, a high-quality brush is ideal. For larger areas of siding, a roller is generally faster and more efficient. Rollers with different nap lengths are available to suit various siding textures. Airless sprayers can provide a very smooth and even finish, especially on large, flat surfaces, but require careful preparation and technique to avoid overspray and runs. Sprayers are generally not recommended for textured siding. For example, a brush would be best suited for painting the intricate details of clapboard siding, while a roller would be more efficient for painting large expanses of smooth vinyl siding. An airless sprayer might be a good option for painting a large area of fiber cement siding, but requires more expertise to avoid runs.
Surface Preparation and Cleaning
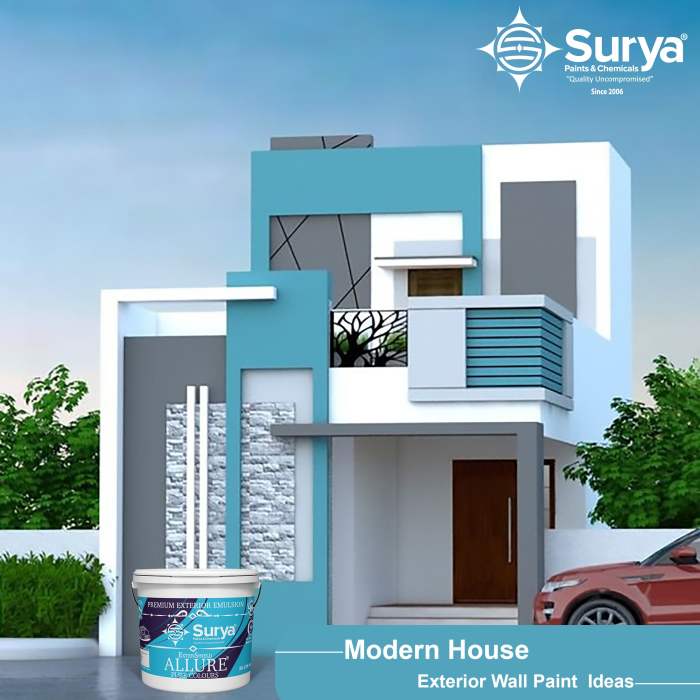
Source: spcsurya.com
Proper surface preparation is crucial for a long-lasting, beautiful paint job on your siding. A clean surface ensures the paint adheres properly, preventing peeling and chipping. Neglecting this step can lead to premature paint failure and costly repairs down the line. This section details the essential steps to prepare your siding for painting, regardless of the material.
Cleaning Methods for Different Siding Materials
Choosing the right cleaning method depends heavily on your siding material. Using the wrong technique can damage your siding, undoing all your hard work. The following table lists articles suitable cleaning methods and precautions for common siding materials.
| Siding Material | Cleaning Method | Recommended Products | Precautions |
|---|---|---|---|
| Wood | Power washing (low pressure), scrubbing with brush | TSP (trisodium phosphate), mild detergent, oxygen bleach | Avoid high-pressure settings which can damage the wood grain. Always rinse thoroughly. |
| Vinyl | Power washing (low pressure), scrubbing with soft brush | Mild detergent, vinyl siding cleaner | Avoid harsh chemicals or abrasive cleaners. Don’t use high-pressure settings, as they can damage the vinyl. |
| Aluminum | Power washing (low pressure), scrubbing with soft brush | Mild detergent | Avoid abrasive cleaners which can scratch the aluminum surface. Rinse thoroughly to remove all soap residue. |
| Fiber Cement | Power washing (low to medium pressure), scrubbing with a stiff brush | TSP (trisodium phosphate), oxygen bleach | Be cautious with power washing; too much pressure can damage the surface. Always wear protective eyewear. |
Repairing Damaged Siding Sections
Before painting, inspect your siding for any damage such as cracks, holes, or loose boards. Repairing these issues before painting is essential to prevent further deterioration and ensure a smooth, even paint finish. Minor cracks can often be filled with caulk, while larger holes might require patching with appropriate materials like wood filler (for wood siding) or specialized repair compounds (for vinyl or fiber cement). Always ensure the repair material is compatible with your siding type. For severely damaged sections, replacement might be necessary.
Removing Loose Paint and Mildew/Mold
Loose, flaking paint provides a poor surface for new paint to adhere to. Scrape away all loose paint using a putty knife or paint scraper. Be careful not to gouge the underlying siding. Mildew and mold are not only unsightly but also can compromise the integrity of the paint job. Remove mildew and mold using a solution of bleach and water (following product instructions carefully), scrubbing with a stiff brush and rinsing thoroughly. For persistent mold, consider using a commercial mildew remover. Always wear appropriate protective gear, including gloves and eye protection, when working with bleach.
Caulking Gaps and Cracks
Caulking gaps and cracks is vital to prevent water intrusion, a major cause of siding damage. Use a high-quality exterior-grade caulk that’s compatible with your siding material. Apply a thin, even bead of caulk to all gaps and cracks, smoothing it with a wet finger or caulking tool. Allow the caulk to cure completely before painting. This step significantly improves the longevity and weather resistance of your painted siding.
Cost Estimation and Project Planning

Source: houselogic.com
Painting your siding is a significant undertaking, requiring careful planning and budgeting to ensure a successful and cost-effective project. Failing to adequately plan can lead to unexpected expenses and delays. This section will guide you through creating a realistic budget and developing a detailed project plan.
Sample Budget Breakdown for Painting Siding
Accurate cost estimation depends on several factors including the size of your house, the type of siding, the number of coats required, and the cost of labor in your area. This example provides a general framework. Remember to adjust these figures based on your specific circumstances.
| Cost Category | Estimated Cost | Notes |
|---|---|---|
| Materials (Paint, Primer, Brushes, Rollers, Drop Cloths, etc.) | $500 – $1500 | Cost varies greatly depending on paint quality, quantity needed, and brand. Higher-quality paints generally last longer. |
| Labor (If hiring a professional) | $1000 – $5000+ | Labor costs depend heavily on the size of the house, the complexity of the job, and local labor rates. Get multiple quotes. |
| Surface Preparation (Cleaning supplies, caulk, wood filler, etc.) | $100 – $300 | Thorough preparation is crucial for a long-lasting paint job. Don’t skimp on this. |
| Rental Equipment (Scaffolding, pressure washer, etc.) | $50 – $200 | Consider renting if you don’t own the necessary equipment. |
| Unforeseen Costs (e.g., repairs, extra materials) | $100 – $500 | Always budget for unexpected issues. Weather delays or discovering rotted wood can add to the expense. |
| Total Estimated Cost | $1750 – $7500+ | This is a broad range; your actual cost will vary significantly. |
Step-by-Step Project Plan
A well-defined timeline ensures a smooth painting process. This plan assumes a mid-sized house and allows for flexibility. Adjust the timeline based on your project’s scope and available resources.
- Project Planning & Budgeting (1 week): Research, gather quotes, purchase materials, and create a detailed plan.
- Surface Preparation (2-3 days): Clean the siding, repair any damage, caulk gaps, and prime as needed.
- Painting (3-5 days): Apply paint in even coats, allowing sufficient drying time between coats.
- Cleanup (1 day): Dispose of waste properly and clean all equipment.
Essential Tools and Equipment
Having the right tools will make the job easier and more efficient. This list includes essentials; you may need additional items depending on your specific needs.
- Paintbrushes (various sizes)
- Paint rollers (various sizes)
- Paint trays
- Drop cloths
- Ladder (or scaffolding)
- Putty knife
- Caulk gun
- Pressure washer (optional, but highly recommended)
- Safety glasses and gloves
- Painter’s tape
Maintenance and Longevity of Painted Siding
Protecting your investment in freshly painted siding requires consistent care. Regular maintenance not only enhances the aesthetic appeal of your home but also significantly extends the life of the paint job, saving you money and hassle in the long run. Proper upkeep prevents costly repairs and ensures your siding remains a beautiful and functional part of your home for years to come.
Regular cleaning and inspection are paramount to preserving your painted siding. Neglecting these simple steps can lead to premature paint failure and damage to the underlying siding material. The frequency of maintenance will depend on factors such as climate, tree cover, and the type of siding.
Regular Cleaning and Inspection
A simple power washing once or twice a year, depending on your climate and environment, is usually sufficient to remove dirt, mildew, and loose debris. Focus on areas prone to build-up, such as corners, eaves, and ground-level sections. During the cleaning process, carefully inspect the siding for any signs of damage, such as cracks, peeling paint, or loose boards. Addressing these issues promptly can prevent more extensive and costly repairs down the line. For example, a small area of peeling paint can be easily touched up, whereas widespread peeling may require more extensive repainting. A yearly visual inspection, particularly after harsh weather events, can help prevent bigger problems.
Addressing Common Paint Problems
Peeling paint is a common issue, often caused by poor surface preparation before painting, moisture trapped beneath the surface, or the use of an inappropriate paint type for the siding material. Addressing peeling paint involves carefully removing the loose paint, cleaning the surface, and applying a primer before repainting. Fading, on the other hand, is usually a result of sun exposure. Choosing a high-quality, UV-resistant paint can significantly mitigate fading. Mildew growth can be tackled with a mildew-killing solution before cleaning and repainting. Always refer to the paint manufacturer’s instructions for specific cleaning and repair recommendations. For instance, a high-quality acrylic paint might last 10-15 years on properly prepared vinyl siding, while a cheaper alternative might only last 5-7 years.
Expected Lifespan of Exterior Paint
The lifespan of exterior paint varies significantly depending on several factors: the quality of the paint, the type of siding material, the climate, and the level of maintenance. High-quality, 100% acrylic paints generally offer the longest lifespan, often lasting 10-15 years or more on properly prepared surfaces. However, less expensive paints may only last 5-7 years. Wood siding typically requires repainting more frequently than vinyl or fiber cement, due to its porosity and susceptibility to moisture damage. Harsh climates with extreme temperature fluctuations and high humidity will also reduce the lifespan of paint. For example, a home in a coastal region with salty air might require repainting every 7-10 years, whereas a home in a drier climate could see its paint last 12-15 years.
Illustrative Examples of Painted Siding
Let’s explore some real-world examples of how different types of siding look after a fresh coat of paint, highlighting the impact of color and finish on the overall aesthetic. These examples illustrate the versatility of paint in transforming the look of a home.
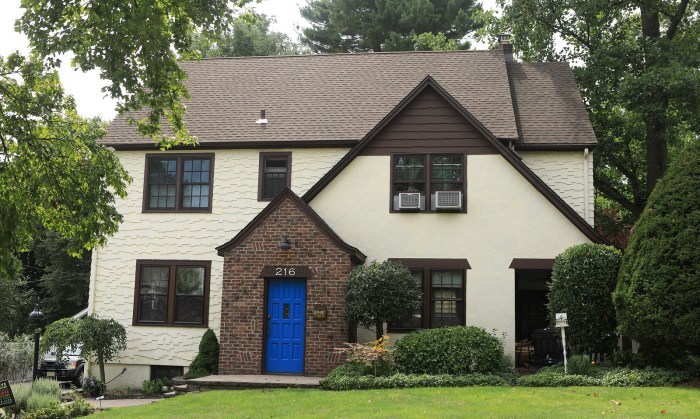
Freshly Painted Vinyl Siding
Imagine a two-story colonial-style home with freshly painted vinyl siding in a warm, sophisticated shade of “Agreeable Gray.” The paint chosen is a satin finish, providing a subtle sheen that reflects light beautifully without being overly glossy. The texture of the vinyl siding, typically smooth, is subtly enhanced by the paint, giving it a slightly more dimensional appearance. The consistent color across the large expanse of the siding creates a feeling of calm and understated elegance. The trim is painted in a crisp white, providing a classic contrast that accentuates the architectural details, such as window frames and corner boards. The overall aesthetic is one of timeless sophistication and quiet charm. The homeowner chose this color for its neutrality, allowing the architectural details of the house to shine, and its durability, ensuring the color will remain vibrant for years to come.
Painted Wood Siding on a Charming Cottage
Picture a quaint cottage with clapboard wood siding painted in a cheerful, slightly weathered “Coastal Blue.” The color evokes a sense of seaside charm and tranquility. The paint used has a slightly textured, eggshell finish, highlighting the natural grain of the wood without obscuring it. The trim is painted a contrasting off-white, creating a clean and inviting look. Architectural details, such as the window boxes overflowing with colorful flowers and the charming front porch, are beautifully accented by the color palette. The overall aesthetic is one of rustic charm and welcoming warmth. This color choice, combined with the cottage’s architectural style, creates a home that feels both cozy and inviting. The slightly weathered look of the paint adds to the cottage’s rustic charm, suggesting a history and a connection to the natural surroundings.
Modern Home with Painted Fiber Cement Siding
Envision a sleek, modern home with painted fiber cement siding in a deep, sophisticated shade of charcoal gray. The clean lines of the architecture are emphasized by the smooth, matte finish of the paint. The fiber cement siding itself has a slightly textured surface, providing a subtle visual interest without being overly distracting. The lack of overt ornamentation allows the color to take center stage, creating a bold and contemporary statement. The windows and doors are framed in a contrasting light gray, adding a touch of subtle sophistication. The overall aesthetic is one of clean, modern elegance and understated luxury. The homeowner’s choice of a deep gray emphasizes the home’s sharp lines and modern design, creating a striking visual impact. The matte finish further enhances the contemporary feel, avoiding any unwanted shine or glossiness.
Summary
Source: montclairpainting.com
Painting your siding is a rewarding project that can dramatically improve your home’s appearance and longevity. By following the steps outlined in this guide, from careful preparation and paint selection to proper application and ongoing maintenance, you can achieve a stunning, professional-looking finish that will stand the test of time. Remember, the key is preparation – taking the time to properly clean, repair, and prime your siding will ensure the best possible results and extend the life of your paint job. So grab your brushes, rollers, or sprayer and get ready to transform your home’s exterior!
FAQ Corner: Painting Siding
Can I paint siding in cold weather?
Generally, no. Most exterior paints require temperatures above 50°F (10°C) for proper adhesion and drying.
How long does siding paint last?
It depends on the paint quality, siding material, and climate. Expect 5-10 years, sometimes longer with proper maintenance.
What’s the best time of year to paint siding?
Spring or fall are ideal; avoid extreme heat or cold, and aim for dry weather.
Do I need to remove all existing paint before repainting?
Not necessarily. If the old paint is sound, a thorough cleaning and light sanding might suffice. Remove peeling or flaking paint.
How much paint will I need?
Calculate the square footage of your siding and check the paint can for coverage per gallon. It’s better to have extra than run short.
Comments are closed.