Cedar Shake Siding Installers A Complete Guide
Cedar shake siding installers are essential for achieving the rustic charm and lasting durability of cedar shake siding. Finding the right installer involves careful consideration of their qualifications, experience, and approach to the project. This guide walks you through everything you need to know, from choosing a qualified installer to maintaining your beautiful new siding.
We’ll cover crucial aspects like evaluating potential installers, understanding the installation process, exploring different cedar shake options and their costs, and ensuring the longevity of your investment. We’ll also delve into crucial safety measures and address common concerns to make your cedar shake siding project a success.
Finding Qualified Cedar Shake Siding Installers
Choosing the right installer for your cedar shake siding is crucial for a beautiful and long-lasting result. A poorly installed cedar shake roof or siding can lead to costly repairs and significant aesthetic issues down the line. This section will guide you through the process of finding a qualified and reliable professional.
Evaluating Installer Qualifications
Finding a qualified installer involves more than just checking online reviews. Thorough vetting is key to ensuring a successful project. The following table, Articles’ important criteria and how to verify them:
| Criterion | Importance | How to Verify | Example |
|---|---|---|---|
| Licensing and Certification | Essential; ensures compliance with local building codes and standards. | Check with your local licensing board or relevant authorities. Request copies of licenses and certifications. | A valid contractor’s license issued by the state licensing board. Certifications from organizations like the Cedar Shake and Shingle Bureau. |
| Insurance (Liability and Workers’ Compensation) | Crucial; protects you from financial liability in case of accidents or damage. | Request proof of insurance coverage; verify with the insurance company. | Certificates of insurance showing adequate liability and workers’ compensation coverage. |
| Experience with Cedar Shake Siding | Highly important; specialized knowledge and skills are needed for this type of siding. | Review their portfolio; ask about past projects involving cedar shake siding. | A portfolio showcasing successful installations of cedar shake siding on various types of buildings. |
| References and Testimonials | Highly valuable; allows you to gauge the installer’s reliability and customer satisfaction. | Request references and contact them directly to inquire about their experience. | A list of previous clients willing to speak about their experience with the installer. |
Assessing Installer Expertise and Experience
Direct communication with potential installers is vital. The following points represent key information to obtain from them:
Asking about their experience with different types of cedar shake profiles (e.g., hand-split, machine-sawn) provides insight into their breadth of knowledge. Inquiring about their understanding of proper ventilation and moisture management techniques ensures they understand crucial aspects of cedar shake installation that impact longevity. Furthermore, discussing their familiarity with different fastening methods and their experience with complex projects (e.g., those involving intricate detailing or difficult angles) reveals their skill level and adaptability. Finally, asking about their warranty policy demonstrates their commitment to the quality of their work and their willingness to stand behind it.
Checking References and Reviewing Past Projects
Thoroughly checking references and examining past projects is crucial. This helps to gauge the installer’s workmanship, attention to detail, and overall professionalism.
Contacting past clients allows you to gain firsthand insights into the installer’s performance. The following questions represent valuable inquiries:
- Were you satisfied with the quality of the work?
- Did the installer complete the project on time and within the agreed-upon budget?
- Were there any unexpected issues or problems during the installation process, and how were they handled?
- Would you recommend this installer to others?
- How would you rate their communication and responsiveness throughout the project?
The Cedar Shake Siding Installation Process
Installing cedar shake siding is a complex process requiring skilled labor and attention to detail. A successful installation results in a beautiful, durable, and long-lasting exterior for your home, significantly increasing its curb appeal and value. However, improper installation can lead to premature deterioration and costly repairs. This section outlines the key steps involved in a typical cedar shake siding installation project.
The entire process, from initial consultation to final cleanup, involves a series of carefully planned and executed steps. Each stage is crucial for ensuring the longevity and aesthetic appeal of your new cedar shake siding.
Cedar Shake Siding Installation Steps
A typical cedar shake siding installation project follows these steps:
- Initial Consultation and Assessment: This involves discussing your project needs, preferences (e.g., shake type, color, finish), and budget. The installer will assess the existing structure, taking measurements and identifying any potential challenges, such as existing siding removal, foundation issues, or unusual building features. This stage is critical for accurate cost estimation and project planning.
- Preparation and Material Acquisition: This step includes ordering the necessary cedar shakes, underlayment, fasteners, and other materials. Existing siding will be removed and disposed of responsibly. The underlying structure will be inspected and repaired as needed to ensure a level and solid base for the new siding. This may involve replacing damaged sheathing or addressing moisture issues.
- Installation of Underlayment: A waterproof underlayment is crucial for protecting the building’s structure from moisture damage. This typically involves applying a layer of building paper or a synthetic weather barrier, ensuring proper overlap and secure fastening to prevent gaps or tears.
- Installation of Starter Course: A starter course of cedar shakes is installed at the bottom of the wall to provide a level and consistent base for the remaining shakes. This course helps maintain even spacing and alignment throughout the installation process.
- Installation of Cedar Shakes: Cedar shakes are installed in courses, overlapping each other according to manufacturer specifications. Proper spacing and alignment are essential for a professional look and to prevent moisture buildup. Different types of shakes may require slightly different installation techniques.
- Flashing and Caulking: Flashing is installed around windows, doors, and other openings to prevent water penetration. Caulking seals any gaps or cracks to further enhance weather resistance. This step is crucial in preventing water damage and maintaining the integrity of the siding.
- Final Inspection and Cleanup: A thorough inspection is performed to ensure that the installation meets all building codes and the client’s expectations. Any necessary repairs or adjustments are made. Finally, all debris and waste materials are removed from the worksite, leaving the area clean and tidy.
Types of Cedar Shake Siding and Their Installation Methods
Several types of cedar shake siding are available, each with unique characteristics and installation requirements. The choice depends on factors such as budget, desired aesthetic, and climate conditions.
- Hand-split Shakes: These offer a rustic, natural look. Installation requires careful selection and placement to achieve a uniform appearance. They often require more precise spacing and are typically more expensive than machine-made shakes.
- Machine-made Shakes: These offer a more consistent appearance and are generally easier and faster to install than hand-split shakes. They are usually less expensive and provide a more uniform finish.
- Tapers: These are thicker at the butt and taper to a thinner edge, offering a classic cedar shake profile. Installation involves careful alignment to maintain a consistent look.
- Shingles: While sometimes grouped with shakes, shingles are generally thinner and more uniform in size and shape. They’re often easier to install than shakes, providing a more streamlined appearance.
Cedar Shake Siding Installation Flowchart
A visual representation of the installation process helps to understand the sequential nature of the tasks.
Imagine a flowchart starting with a box labeled “Initial Consultation.” Arrows then lead to boxes representing: “Preparation & Material Acquisition,” “Underlayment Installation,” “Starter Course Installation,” “Shake Installation,” “Flashing & Caulking,” “Final Inspection,” and finally, “Cleanup.” Each box would represent a major step, and smaller boxes or sub-processes could be added within each main step for more detail. For instance, the “Shake Installation” box could have sub-processes like “Laying out shakes,” “Fastening shakes,” and “Checking alignment.” The arrows connecting the boxes clearly show the logical sequence of operations. This visual representation helps streamline the process and ensures a systematic approach to the installation.
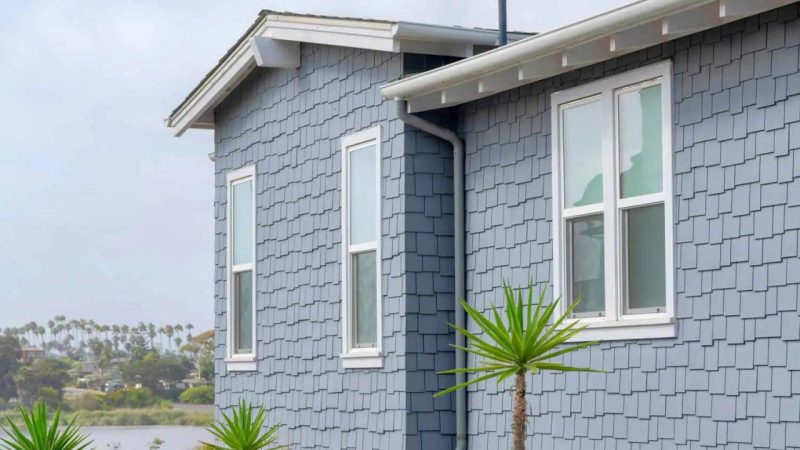
Materials and Costs Associated with Cedar Shake Siding
Source: octanecdn.com
Cedar shake siding offers a beautiful, natural look that can significantly enhance your home’s curb appeal. However, understanding the materials and associated costs is crucial before embarking on such a project. This section will break down the various expenses involved, helping you budget effectively.
Cedar Shake Siding Options and Costs
Choosing the right cedar shake siding depends on your budget and aesthetic preferences. Different types of cedar shake vary in cost, durability, and appearance. The following table provides a general comparison; actual prices can fluctuate based on location, supplier, and market conditions. Note that these are estimates and may not reflect current market pricing.
| Type of Cedar Shake | Cost per Square Foot | Durability | Aesthetic Qualities |
|---|---|---|---|
| Hand-split Shakes | $8-$15+ | High (with proper maintenance) – expect a lifespan of 30-50 years | Rustic, natural, varied texture and thickness |
| Machine-split Shakes | $6-$12+ | Medium-High (with proper maintenance) – expect a lifespan of 25-40 years | More uniform than hand-split, still retains a natural look |
| Tapers | $5-$10+ | Medium (with proper maintenance) – expect a lifespan of 20-30 years | Thinner, more uniform appearance, often used for accents |
| Shingles | $4-$8+ | Medium (with proper maintenance) – expect a lifespan of 15-25 years | Uniform thickness and size, cleaner look |
Cost Breakdown of Cedar Shake Siding Installation
Several factors contribute to the overall cost of a cedar shake siding installation project. A thorough understanding of these expenses is essential for accurate budgeting.
- Materials: This includes the cost of the cedar shakes themselves, underlayment, flashing, nails, and any necessary trim. Prices vary widely based on the type of shake chosen, quantity needed, and supplier.
- Labor: Labor costs are a significant portion of the total expense. Experienced installers command higher rates, and the complexity of the project (e.g., intricate designs, large surface area) also affects labor costs. Expect to pay hourly rates or a per-square-foot charge.
- Permits: Building permits are required in most jurisdictions. The cost of permits varies depending on location and project scope.
- Waste Removal: Proper disposal of construction debris is essential. Factor in the cost of waste removal services.
- Preparation and Repairs: Existing siding removal, repairs to the underlying structure, and preparation of the surface for new siding add to the overall cost.
- Contingency: Always include a contingency in your budget to cover unforeseen expenses or material price increases.
Factors Influencing Overall Cost
Several factors can significantly impact the final cost of your cedar shake siding installation. Careful consideration of these elements will ensure a realistic budget.
- House Size and Complexity: Larger houses and those with complex architectural details require more materials and labor, leading to higher costs. A home with many dormers or intricate trim work will be more expensive to insulate than a simple rectangular structure.
- Cedar Shake Grade and Quality: Higher-grade cedar shakes, such as those with tighter knot spacing and fewer imperfections, command a higher price. Choosing premium shakes will result in a more expensive project.
- Geographic Location: Labor and material costs vary by region. Areas with higher labor costs or limited access to cedar shake suppliers will generally result in a higher overall project cost. For example, a project in a remote mountain community may be more expensive than a similar project in a major city with readily available resources.
- Installer Experience and Reputation: Experienced and reputable installers often charge higher rates, but their expertise ensures a higher-quality installation and reduces the risk of future problems. While less expensive installers might seem appealing, the long-term costs of correcting their mistakes could far outweigh the initial savings.
Maintenance and Longevity of Cedar Shake Siding
Cedar shake siding, with its natural beauty and rustic charm, offers a unique aesthetic appeal for homes. However, to ensure its longevity and maintain its attractive appearance, regular maintenance is crucial. Understanding the proper care and addressing potential issues proactively will extend the life of your investment significantly.
Proper Maintenance Procedures for Cedar Shake Siding
Regular cleaning and preventative measures are key to preserving the beauty and structural integrity of your cedar shake siding. Neglecting maintenance can lead to premature deterioration and costly repairs. A proactive approach, however, can significantly extend the lifespan of your siding.
- Annual Cleaning: A thorough cleaning at least once a year is recommended. Use a soft-bristled brush and a gentle solution of water and mild detergent. Avoid high-pressure washers, which can damage the shakes. Rinse thoroughly with clean water. For stubborn stains, consider a specialized wood cleaner following the manufacturer’s instructions carefully.
- Inspection for Damage: During the cleaning process, carefully inspect the siding for any signs of damage, such as cracks, loose shakes, or insect infestation. Address any issues promptly to prevent further deterioration.
- Caulking and Sealing: Regularly check and reapply caulking around windows, doors, and other areas where the siding meets other building materials. This prevents water penetration, a major cause of damage.
- Stain and Sealant Application: Depending on the type of finish applied during installation (or the lack thereof), you may need to reapply a stain or sealant every few years. This protects the wood from moisture, UV damage, and insect infestation. Follow the manufacturer’s instructions carefully for application and drying time.
- Gutter and Downspout Maintenance: Ensure gutters and downspouts are clean and functioning properly to direct water away from the foundation and siding. Water accumulation can lead to rot and other damage.
Common Problems and Their Prevention
Several issues can affect cedar shake siding over time. Understanding these problems and implementing preventative measures can help maintain the integrity and beauty of your home’s exterior.
- Rot and Decay: This is often caused by prolonged exposure to moisture. Proper sealing, gutter maintenance, and prompt repair of any damaged shakes are crucial for prevention.
- Insect Infestation: Termites and carpenter ants can damage cedar shakes. Regular inspections and professional pest control treatments can help mitigate this risk.
- Moss and Algae Growth: These can occur in humid climates. Regular cleaning and the application of appropriate treatments can prevent excessive growth.
- Cracking and Splitting: This can be caused by extreme temperature fluctuations or improper installation. Careful installation and regular maintenance can minimize this issue. Addressing cracks promptly is important to prevent further damage.
Lifespan Comparison to Other Siding Materials
Cedar shake siding generally has a lifespan of 30-50 years, though this can vary depending on the climate, maintenance, and quality of the installation. Other siding materials have different lifespans. For example, vinyl siding typically lasts 20-30 years, while fiber cement siding can last 50 years or more. Aluminum siding is relatively durable, boasting a potential lifespan of 40 years or more. Brick siding offers one of the longest lifespans, potentially lasting over 100 years. However, cedar shake offers a unique aesthetic appeal that many homeowners find worth the extra maintenance. The lifespan of any siding is also heavily dependent on proper installation and regular maintenance.
Safety Precautions During Cedar Shake Siding Installation

Source: advanceroofingllc.com
Cedar shake siding installation, while aesthetically rewarding, presents several inherent risks. Prioritizing safety is paramount, not just for legal compliance, but for the well-being of the installation crew. Failing to adhere to safety protocols can lead to serious injuries, project delays, and increased costs. This section details crucial safety measures to ensure a safe and successful installation.
Working at heights is a significant aspect of cedar shake siding installation. This inherently increases the risk of falls, which can result in catastrophic injuries. Therefore, meticulous planning and the use of appropriate safety equipment are essential.
Personal Protective Equipment (PPE)
Appropriate personal protective equipment is the first line of defense against workplace hazards. This isn’t just about following regulations; it’s about protecting the lives and well-being of those working on the project. Each worker should be equipped with and consistently use the following: hard hats to protect against falling objects, safety glasses or goggles to shield eyes from flying debris, work gloves to prevent cuts and splinters, and hearing protection to reduce noise-induced hearing loss from power tools. Furthermore, depending on the specific task, respirators may be necessary to filter out dust and wood particles. High-visibility clothing is also recommended to improve visibility and prevent accidents.
Potential Hazards and Mitigation Strategies, Cedar shake siding installers
Several hazards are inherent in cedar shake siding installation. Understanding these risks and implementing appropriate mitigation strategies is crucial for a safe working environment.
- Falling from Heights: This is arguably the most significant risk. Mitigation involves using appropriate scaffolding, fall arrest systems, and safety harnesses. Regular inspections of scaffolding and equipment are crucial.
- Falling Objects: Tools, materials, and even pieces of cedar shake can fall from heights. Proper storage of materials, using tool lanyards, and maintaining a clean work area significantly reduce this risk.
- Cuts and Punctures: Sharp cedar shake pieces and tools can cause cuts. Wearing gloves, using appropriate tools, and handling materials carefully are essential preventative measures.
- Exposure to Wood Dust: Cedar shake generates significant dust, which can cause respiratory irritation. Using respirators and maintaining good ventilation minimizes this hazard. Regular cleaning of the work area also helps.
- Power Tool Injuries: Power tools pose a risk of cuts, bruises, and more severe injuries. Using appropriate safety guards, ensuring proper tool maintenance, and following manufacturer instructions are vital.
Scaffolding and Fall Protection
Proper scaffolding and fall protection are non-negotiable aspects of safe cedar shake siding installation. Scaffolding must be adequately sized, properly erected, and regularly inspected for stability. Workers should always use appropriate fall protection equipment, including safety harnesses and anchor points, whenever working at heights. The use of guardrails and toe boards on scaffolding platforms further enhances safety. A competent person should inspect all scaffolding and fall protection systems before use. Regular inspections throughout the project are also crucial to ensure ongoing safety. Failure to implement these measures can result in serious injuries or fatalities. For example, a collapse of improperly constructed scaffolding could lead to multiple injuries, significantly impacting the project and causing substantial legal and financial repercussions.
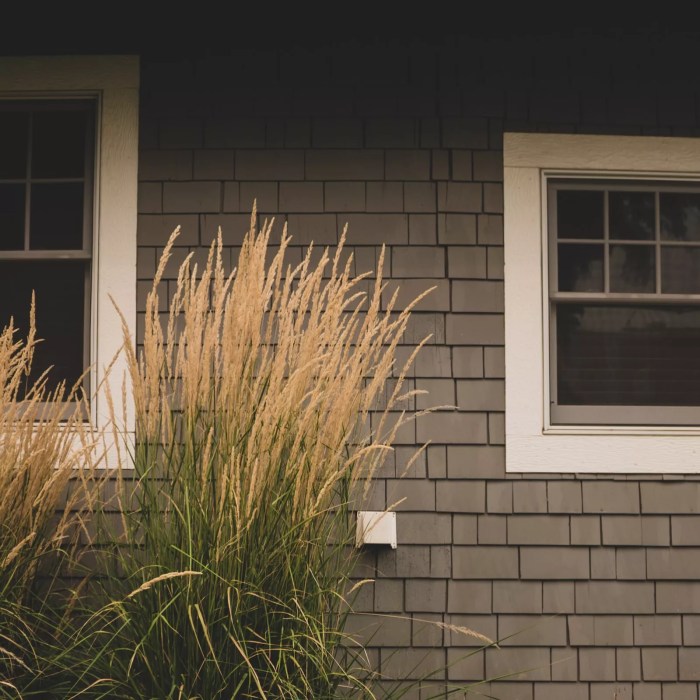
Outcome Summary

Source: angi.com
Installing cedar shake siding is a significant investment that enhances your home’s curb appeal and value. By carefully selecting a qualified installer, understanding the process, and prioritizing proper maintenance, you can enjoy the beauty and durability of cedar shake siding for years to come. Remember, thorough planning and preparation are key to a successful project. So take your time, do your research, and choose wisely – your dream home exterior awaits!
Top FAQs: Cedar Shake Siding Installers
What is the average lifespan of cedar shake siding?
With proper maintenance, cedar shake siding can last 30-50 years, sometimes even longer.
How often should I clean my cedar shake siding?
At least once a year, preferably in the spring or fall, using a soft brush and water. Pressure washing is generally discouraged.
Do I need a permit for cedar shake siding installation?
Permits are usually required; check with your local building department.
Can I install cedar shake siding myself?
While possible, it’s generally recommended to hire professionals due to the complexity and safety considerations involved.
What are the common signs of cedar shake siding damage?
Look for cracks, warping, rot, moss growth, or significant discoloration. Address issues promptly to prevent further damage.
Comments are closed.